The schedule is long (about 10 hours), but it’s laid out with breaks that keep the drive from feeling endless. I also appreciate when the operator has great energy; in one account, the guide Marvin helped keep the mood upbeat, which matters on a full day like this.
Key highlights that matter on the ground
- U.S. 93 + Joshua Tree forest break right after pickup, so you’re not stuck in pure road time
- 4 hours at Grand Canyon West (Hualapai Reservation), enough for rim views, lunch time, and ranch time
- Eagle Point / Sky View Restaurant stop to see where the Skywalk connects before you decide on the ticket
- Guano Point finale with time to eat, take a short walk, or just soak in the West Rim views
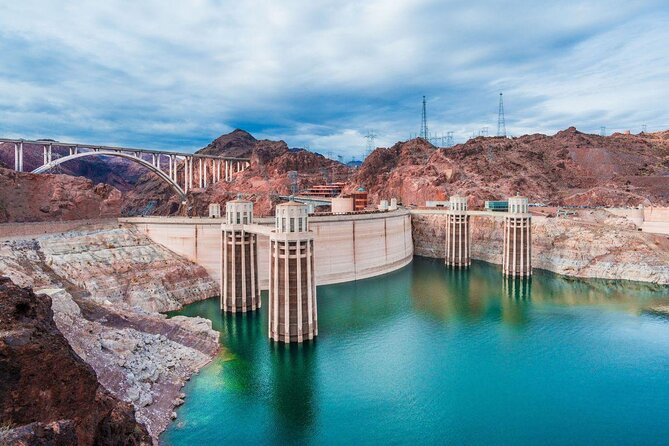
- Hoover Dam area photo stop at Mike O’Callaghan–Pat Tillman Memorial Bridge (890 feet above the Colorado River)
- Max group size up to 60 for the day, with a smaller group option depending on what you book
How the full day runs from the Las Vegas Strip
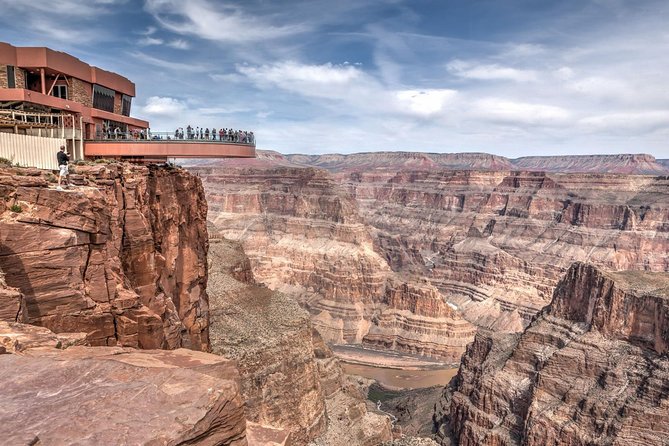
This is a classic “leave early, come back later” canyon day. Pickup happens from most hotels on the Strip, and the total time is listed at about 10 hours. The road trip between Las Vegas and Grand Canyon West is roughly 2 to 3 hours each way, so most of your day is spent commuting plus a solid chunk of time at the canyon.
You’ll ride in a vehicle that depends on group size—anything from a sedan and SUV to a minivan or a full-size van. The tour caps at 60 people, which usually keeps things organized, especially since you’re following a set itinerary with timed stops.
The morning start can feel early. In one account, the group departed at 6:20am and was back around 5:30pm, which gives you a realistic sense of how long the day feels once you count pickup and drive time. If you hate rushed mornings, bring patience and plan to go into day-trip mode.
Who this tour fits best
If you want canyon views without renting a car, navigating parking, or worrying about checkpoints, this is a strong fit. It also works well if you love photography and want predictable stops where you can get out, frame shots, and move on.
If you’re chasing long hikes, remote trails, or deep time at multiple Grand Canyon sectors, you’ll likely want a different style of trip. Here, you’re doing highlights with just enough time at each stop to enjoy it.
The U.S. 93 Joshua Tree forest stop: a quick reset before the canyon
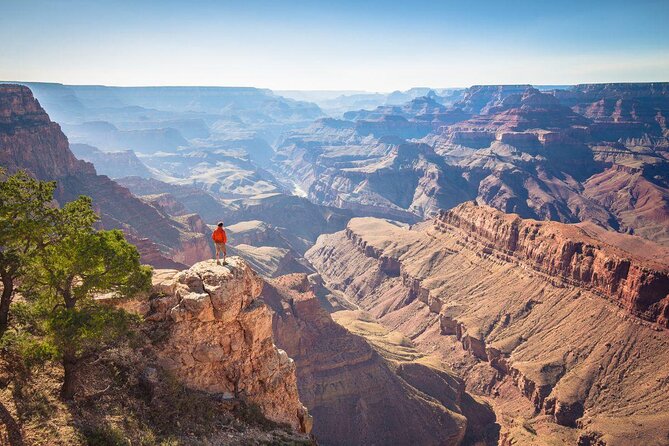
The first stop is off U.S. 93, a short break that’s listed at about 10 minutes. The goal here isn’t the main attraction—it’s a chance to stretch, grab a breath of different scenery, and get your bearings before the big canyon day starts.
You’ll also get a glimpse of Arizona’s Joshua Tree forest along the way. It’s the kind of “in-between” scenery that helps the day feel like more than just a drive to one viewpoint. Even a quick stop can make the later canyon time feel even more rewarding.
Grand Canyon West on the Hualapai Reservation: your main 4-hour window
This is the heart of the tour. You get about 4 hours at Grand Canyon West on the Hualapai Reservation. That time is designed for the big rim views, lunch time, and additional experiences on-site (like Hualapai Ranch). Optional experiences may include a helicopter add-on, though that’s not required to enjoy the day.
Why 4 hours is a practical amount of time
Four hours sounds simple, but it’s a sweet spot for most people:
- You can see the main rim viewpoints without feeling like you’re sprinting.
- You have time to eat rather than grabbing a snack and running back to the bus.
- You can choose how active you want to be, from short walks to more time at lookouts.
What to do with your time at Grand Canyon West
Use that 4-hour block to do two things: pick at least one main rim viewing spot for wide photos, then plan one other lookout for a different angle. The itinerary later adds Guano Point, which helps you get variety without needing extra tickets or extra planning.
If you care about the Skywalk, don’t ignore the next stop (Eagle Point). It’s where you’ll get the “this is what you’re paying for” view before deciding.
Also note: the tour includes Grand Canyon entrance fees, so you’re not stuck figuring out ticket paperwork at the first gate.
Eagle Point and Sky View Restaurant: deciding on the Skywalk ticket
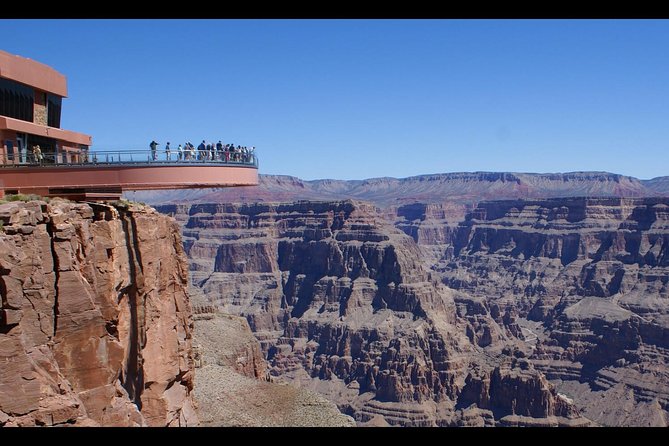
After Grand Canyon West, you’ll stop at Sky View Restaurant, about 30 minutes, with admission not required for the stop itself. This is where you get access to Eagle Point, home of the Grand Canyon Skywalk.
This part of the day is smart because it gives you context. You’re not hearing about a glass bridge from afar; you see the area where the Skywalk juts out, and you can decide whether it’s worth spending extra money on the timed experience.
The big reality check on Skywalk
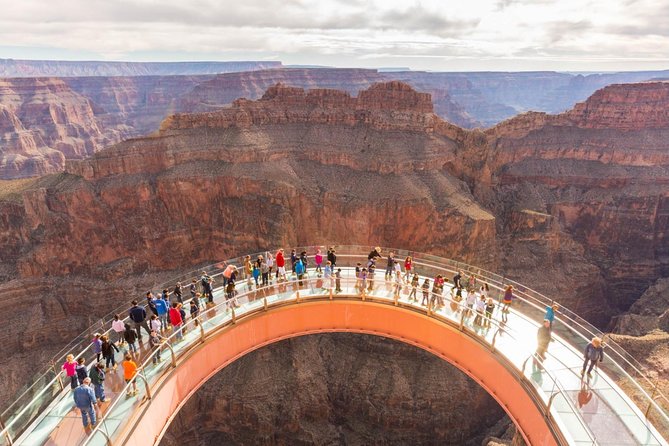
The Skywalk ticket is optional and not included in the base price. That means you’ll likely want to plan your budget early. If you’re the type who’s always thought about walking out over the canyon, it’s usually the one add-on that makes the whole day feel “worth the hype.”
From the accounts provided, the Skywalk comes through as a standout. One person specifically called out buying the Skywalk ticket, framing it as a must-do if you can.
Grand Canyon West Skywalk: glass over the canyon (optional)
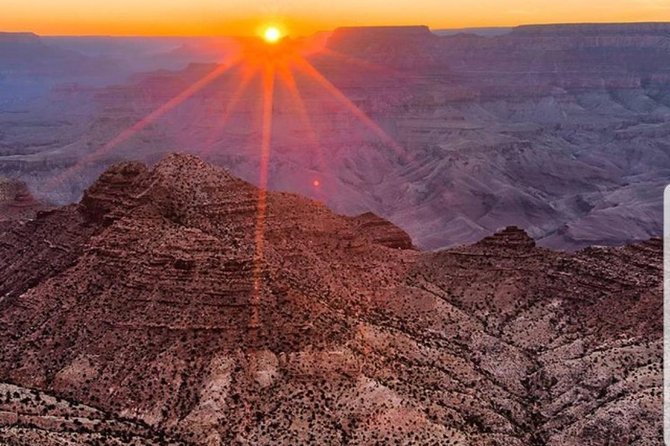
If you choose it, you’ll have about 30 minutes for the Skywalk itself. This is the world-famous glass bridge that juts out over the canyon, with a direct view downward.
When you’re deciding, think about two things:
- Do you want an experience you can’t replicate elsewhere?
- Are you comfortable with heights and standing on a transparent surface?
This is also one of those photo moments where timing matters. Dress so you can move comfortably, keep your phone and camera ready, and don’t plan to keep changing outfits mid-stop.
Guano Point: the last big viewpoint and where you can slow down
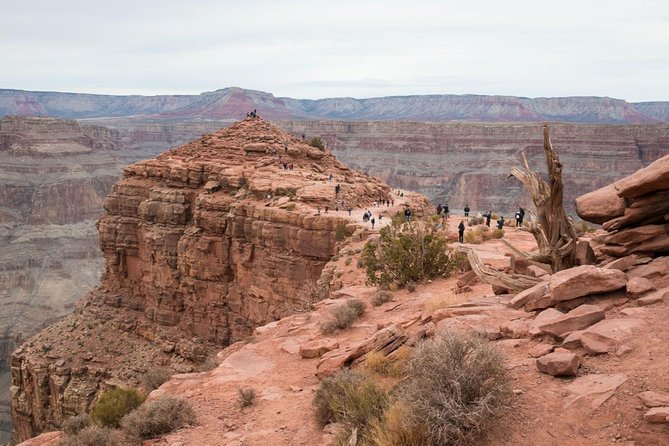
After the Skywalk experience, the tour finishes the canyon portion with Guano Point. You’ll get about 30 minutes, and this stop includes admission.
Guano Point is a solid ending because it’s flexible. The itinerary notes that you can enjoy a meal here, take a short hike, or simply sit and take in the views. That matters because it gives you an “endcap” to the day rather than the constant push to keep moving.
If you want photos, Guano Point is a good place to wrap up with a different perspective than what you got at Eagle Point. If you want less walking, you can just stay put and watch the light change across the canyon walls.
Mike O’Callaghan–Pat Tillman Memorial Bridge: a Colorado River photo moment
Before you head back to Las Vegas, you stop at the Mike O’Callaghan–Pat Tillman Memorial Bridge for a free photo stop. This bridge spans the Colorado River between Arizona and Nevada.
The details here are what make it fun:
- It sits about 890 feet above the Colorado River
- It has four lanes
- It was built to ease problems linked to the old U.S. 93 crossing that went over the Hoover Dam itself
So yes, it’s a photo stop—but it’s also a quick lesson in how the modern route solved the old bottleneck. The arch shape makes it visually satisfying even if you only have a few minutes.
Bonus stop at Hemenway Park: bighorn sheep odds, if weather cooperates
If time and conditions allow, the tour adds a short stop at Hemenway Park in Boulder City. It’s listed at about 10 minutes and is specifically a chance to possibly spot bighorn sheep.
This is the kind of bonus that you don’t want to build your day around, but it can be a delightful extra if it happens. If weather is off, don’t be surprised if this stop is skipped.
Price and value: what $179 buys you, and what costs extra
At $179 per person, this tour can be good value when you add up what’s handled for you.
Included in the price
You’re getting:
- Bottled water
- Snacks (including a cereal bar)
- Grand Canyon entrance fee
- Lunch
That’s important because canyon days add up fast. Entrance fees and basic food planning can quietly turn a day trip into a more expensive day than it first looks.
What’s not included
Two things to plan around:
- The Skywalk ticket is optional and not included
- Optional add-ons like a helicopter experience may exist, but those aren’t included in the base price
If Skywalk is part of your must-do list, budget for it up front. If it isn’t, you can still have a full day of canyon viewpoints and photo stops without paying for the glass bridge.
Comfort vs control
A key “value” angle here is that you don’t need to drive. You get a structured day, timed stops, and a vehicle that fits group size. For many people, that’s worth real money—especially if you’re short on time in Las Vegas.
What to pack and how to dress for this day trip
This is a desert-to-canyon day, so keep your clothing practical.
Wear hiking or athletic shoes. The itinerary includes rim viewpoints and short walks (especially with the Guano Point option), and you’ll want traction and comfort. For timing, remember mornings can feel cooler.
Dress for the season:
- Oct–Feb: long pants and a warm jacket
- Mar–Sept: shorts, a light shirt, and a hat
Bring a camera. You’ll have photo opportunities at the canyon and the Colorado River bridge, plus the Hoover Dam area photo stop.
Also keep in mind that there are no restrooms onboard the vehicle. There are restrooms at several of the stops, and the guide may make en-route stops when possible. So don’t wait until you’re desperate.
Small logistics that can make or break your experience
A few practical notes help you avoid the most common friction points on this type of tour.
- Pickup timing varies by option. Private tour pickup starts at 8 AM; the transfer option pickup is typically prior to 5:30 AM. Either way, confirm exact pickup details using the phone number on your ticket at least 24 hours before departure.
- Group size is capped. The day can have up to 60 people. Smaller group options (like transfer with no more than 14) can make photo stops feel less crowded.
- Language is English. If you need another language, you’d want to double-check what’s offered when you book.
- Weather matters. This experience requires good weather, and if it’s canceled due to poor conditions, you’ll be offered another date or a full refund.
Should you book this Grand Canyon West and Hoover Dam day trip?
Book it if you want:
- A stress-free way to see Grand Canyon West without driving
- A full day built around major viewpoints, including Hoover Dam area photos and the Colorado River bridge
- The option to add the Skywalk if it matches your “I want the experience” level
Skip it (or consider a different trip) if you:
- Don’t want extra ticket costs once you arrive
- Want more time for longer hikes or a slower pace
- Can’t handle a long day with limited restroom access onboard
If Skywalk is on your bucket list, this day trip is a very efficient way to make it happen. Just go in knowing it’s an add-on, dress for comfort, and treat the day like a photography-and-views marathon with breaks rather than a relaxed stroll.
FAQ
What does the $179 price include?
The price includes bottled water, snacks (including a cereal bar), the Grand Canyon entrance fee, and lunch.
Is the Skywalk ticket included?
No. The Skywalk ticket is optional and not included in the tour price.
How much time do I spend at Grand Canyon West?
You’ll have about 3 to 4 hours at Grand Canyon West, and the itinerary lists a 4-hour block.
How long is the drive between Las Vegas and the Grand Canyon West?
The drive is approximately 2 to 3 hours in each direction.
Are there restrooms on the vehicle?
No restrooms are available onboard the vehicle, but your guide can make stops when possible, and restrooms are available at several stops.
What should I wear for the tour?
Hiking or athletic shoes are recommended. Dress by season: long pants and a warm jacket in cooler months (Oct–Feb), and shorts, a light shirt, and a hat in warmer months (Mar–Sept).
Can children join the tour?
Yes. Guests of all ages are welcome.
Do you provide child seats?
Yes. If you need a child seat, specify your child’s age and weight in the Special Requirements box at checkout.
]]>There is one planning wrinkle to keep in mind. If you book through a third-party site, you might not get to pick the exact room you want; one past booking said it only showed the easiest option.
Key Points at a Glance
- Seven third-generation rooms with different themes and difficulty levels, from zombies to wizardry to a casino heist.
- One hour of focused teamwork with a small group size limited to 7 participants.
- A full bar and lounge on-site, with themed drinks available before or after your session (food and drinks are sold separately).
- Age rules by room: most rooms require ages 8+, while the Morning After room requires age 18+.
- English instruction and wheelchair accessibility, so mixed groups have a better shot at feeling comfortable and included.
Inside The Venetian: Where Your Escape Room Adventure Starts

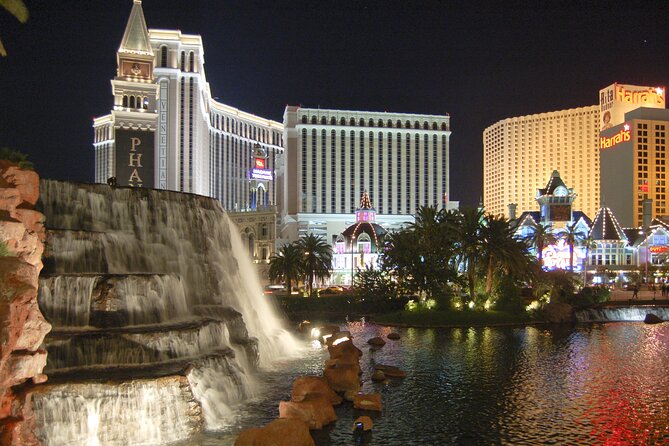
PanIQ Escape Room sits inside the Grand Canal Shoppes at The Venetian Resort. That matters more than you might think. Instead of a hidden off-Strip storefront, you’re starting in a major, central resort area with the kind of atmosphere that makes a night out feel like a full plan—not a quick stop.
The venue setup also supports the main idea behind PanIQ: it’s not only about puzzles. It’s a Vegas night with an escape room at the center. You’ll be able to build time around your game, grabbing a drink and then shifting gears into problem-solving.
If you’re coming from a show or dinner, this is the kind of place where you can show up, check in, and let the one-hour clock do what clocks do best: keep things moving.
Choose Your Mission: Zombie Outbreak, Wizard Trials, and Casino Heist
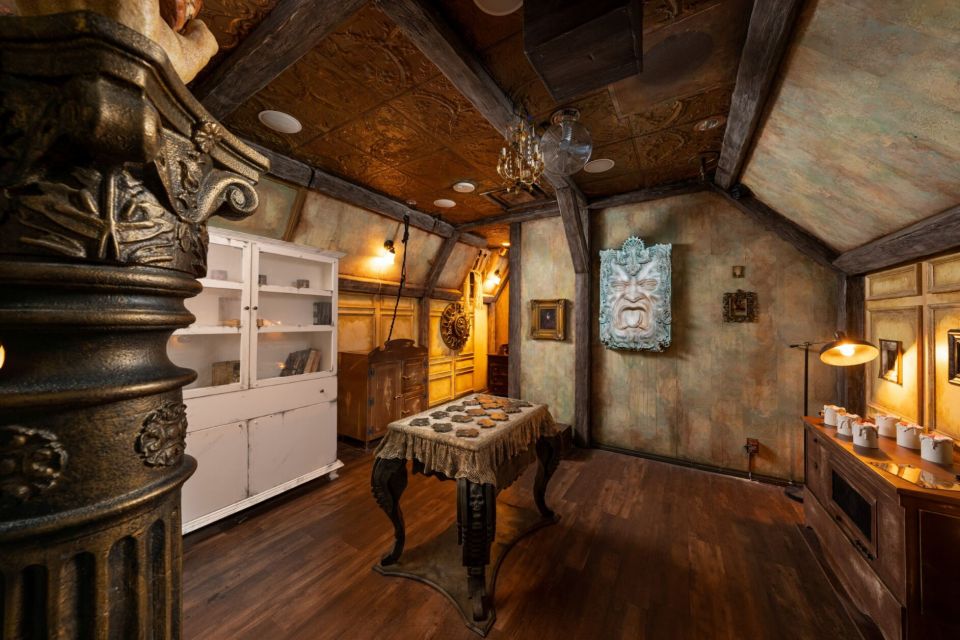
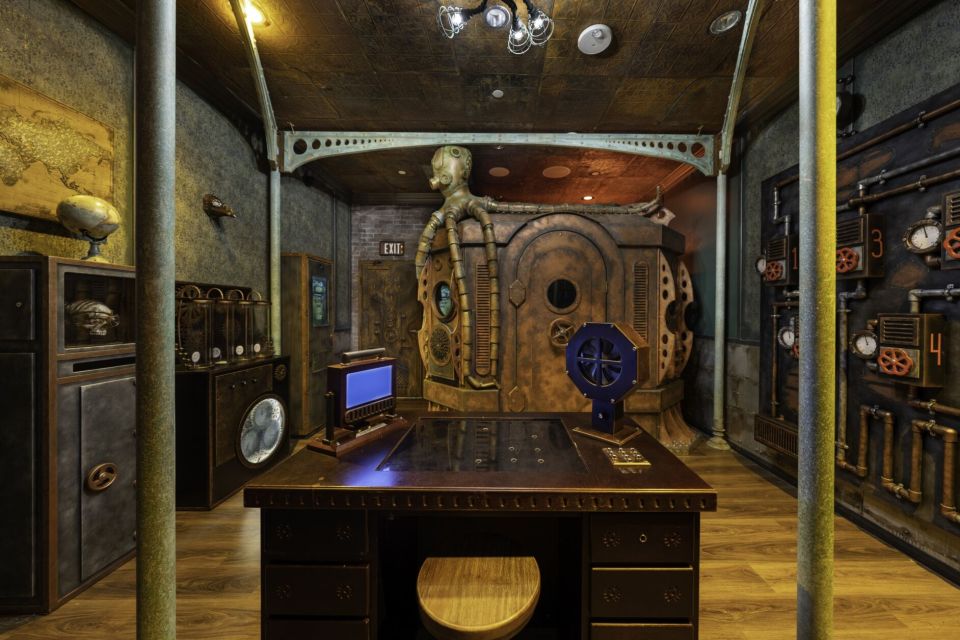
PanIQ offers seven different themed rooms, each with its own level of difficulty. The exact room you pick changes the vibe, the pacing, and the type of challenge you’re likely to enjoy most.
Here are three of the named options you can plan around:
- Zombie Outbreak: the survival-apocalypse theme. If you like urgency and high-stakes story energy, this is the obvious pick.
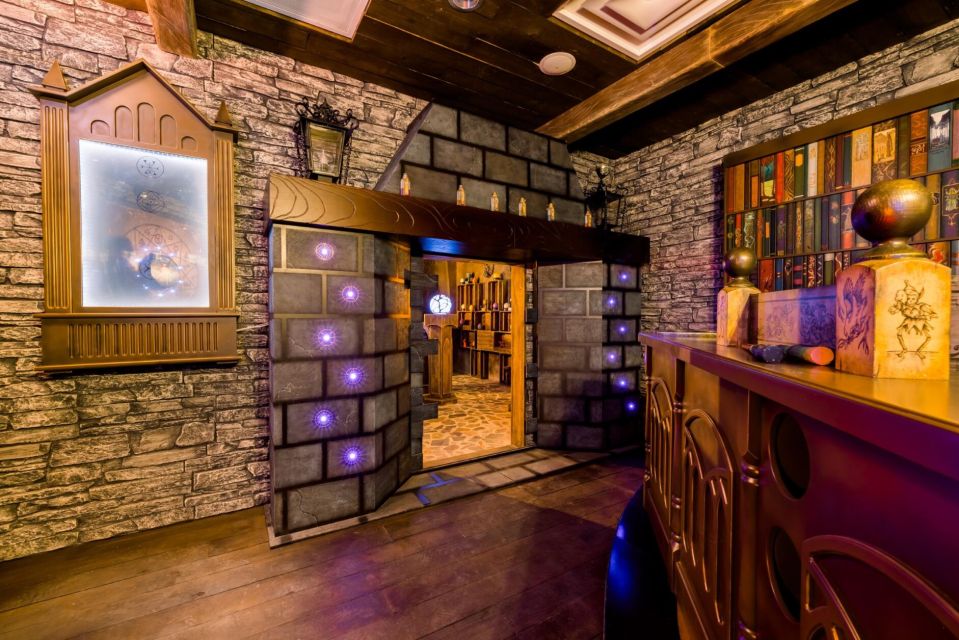
- Wizard Trials: the magic-themed room. If you’re the type who likes puzzles that feel like they’re playing by special rules, this theme tends to be a good fit.
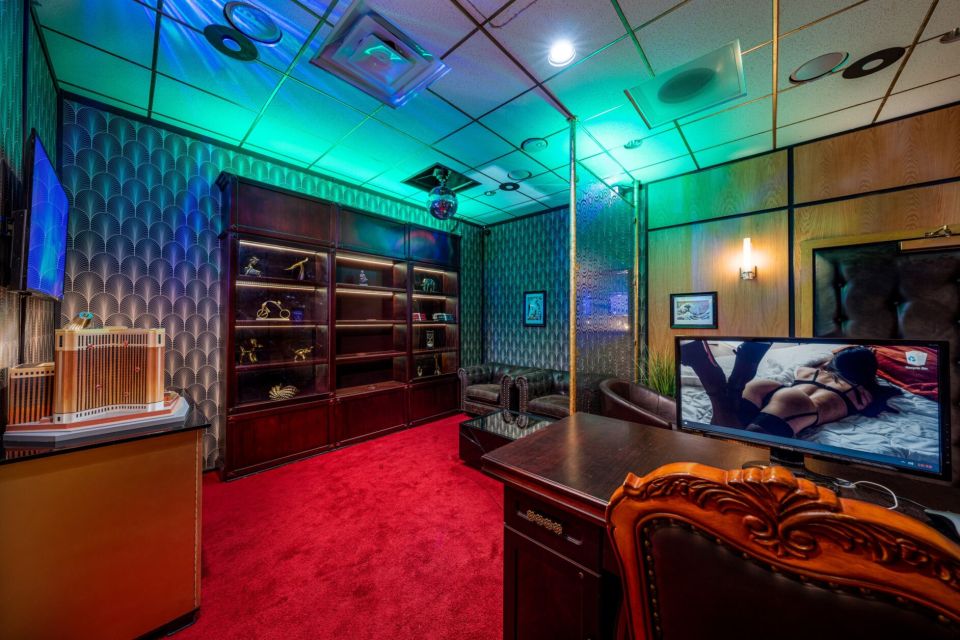
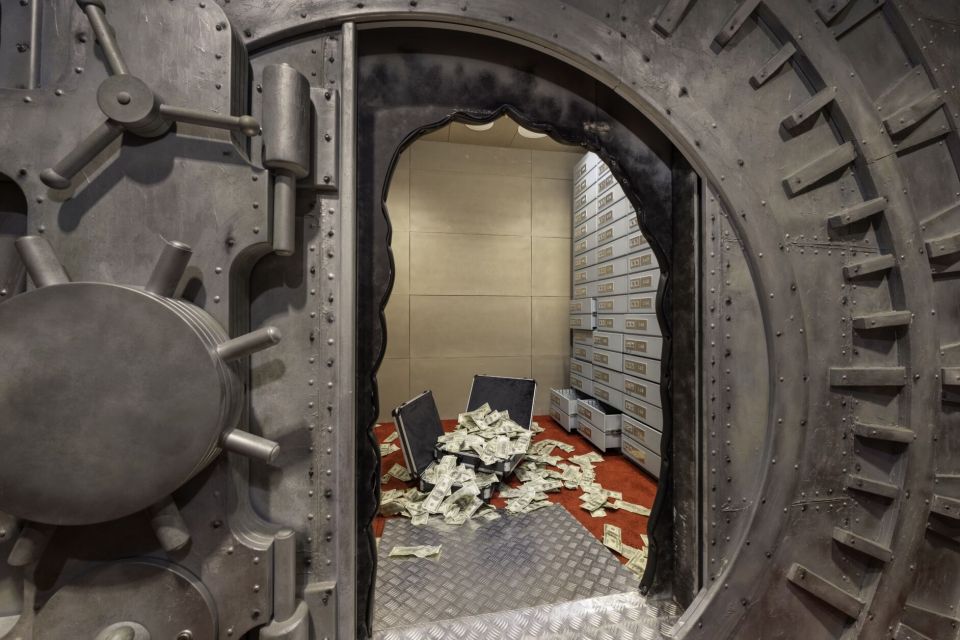
- Casino Heist: you’re trying to beat the odds in a heist-style setting. If you like logic mixed with a storyline and a bit of bluff-and-balance thinking, this one is built for you.
You’ll also see a Morning After room listed with an 18+ requirement. That’s a key detail for planning a group night. If you’re traveling with teens or want a family-friendly option, you’ll likely stick to one of the rooms that allow ages 8+.
How to pick based on difficulty (without getting surprised)
Because there are different difficulty levels, I recommend choosing based on your team’s comfort with puzzles rather than your team’s hype. If you’ve got first-timers, start on the easier end and treat the session like a learning run. If your group loves brain teasers and wants more pressure, go for a higher-difficulty room and lean into it.
Also, one practical warning: at least one past booking reported that when booked through GetYourGuide, the room selection wasn’t shown—only the easiest room. So if having Zombie Outbreak vs. Wizard Trials is important to you, double-check how room selection works when you book.
What a Typical One-Hour Session Feels Like
The game runs for one hour, and it’s designed to keep you in motion. You’ll be solving puzzles, searching for clues, breaking codes, and handling challenges that are meant to get harder as you go. The structure is simple: you and your team are trying to make progress together, and the room gives you the next problem when you’re ready.
You’ll also have an instructor available (the session language is English). That’s useful even if you’re confident. Escape rooms often include moments where the solution is obvious once you see how the clue is meant to be read. In a timed setting, having instruction support can save your group from stalling on the wrong step.
Because the group is small—limited to 7 participants—you usually won’t end up with that awkward feeling of too many people standing around. It’s easier to keep one person scanning for clues, another working on a code or sequence, and another double-checking what you already found.
And because the session is one hour, you don’t need to worry about turning your evening into a half-day project. This is ideal for a Vegas schedule where you’re already juggling shows, meals, and walking time.
The biggest “make or break” moment
In my experience with escape-style activities, the hardest part isn’t the final puzzle—it’s the first 10 minutes. When you walk in, you need to orient fast: where to look, how to communicate, and how to decide who tries what.
If you want a smoother start, go in with a quick team agreement:
- Who leads clue hunting?
- Who handles codes and sequences?
- What do you do if you’re stuck—try one more angle or ask for help?
You don’t need a committee. Just a plan so the room doesn’t swallow your energy.
The Full Bar and Lounge: A Vegas Twist on Escape Rooms
PanIQ is different because it combines a brain-challenging escape room with a full bar and lounge. Drinks and food are sold separately, but that still changes the experience in a practical way.
Here’s the part I think you’ll feel immediately: it gives you a social landing spot. Escape rooms can be intense. Having a lounge nearby means your team can settle in before the timer starts, then talk about what you noticed after the game ends—without instantly splitting up and wandering the casino floor.
It also creates more flexibility around your schedule. If you want a calm warm-up, you can grab a drink first. If you want to focus, you can keep it light and use the bar as a reward afterward. Either way, the bar fits the Vegas rhythm.
They offer themed signature cocktails plus classic drinks. If your group enjoys tasting something new, this is the easy win: you’re already at a Vegas resort, so you might as well make the evening feel like an event—not just a puzzle.
Age Rules and Room Fit: Planning for Families and Adult Groups
PanIQ has clear age requirements that you should treat as non-negotiable for planning:
- Most rooms require participants to be 8 years or older
- Morning After requires participants to be 18+
So if you’re traveling with kids, you’re choosing your room with the age rules in mind, not just the theme you like most. Zombie Outbreak, Wizard Trials, and Casino Heist are the named options you can use to start your planning, but you’ll still want to verify that the specific room you book fits your ages.
This also affects how you form teams. If you’re bringing mixed ages, consider assigning puzzle roles that match comfort levels. Younger participants often do well with clue hunting and pattern spotting, while adults may take more quickly to code-breaking tasks.
For adult groups—especially those looking for a later-night activity—the bar and lounge factor may matter as much as the theme.
Price and Value: Is $36 Worth It?
At $36 per person for a one-hour experience, I think the value comes from three places.
First, you’re paying for a timed, structured activity. That’s often where you get your money’s worth in Vegas: you’re buying time that’s fun, focused, and doesn’t depend on you finding the “right” ticket or the “right” restaurant.
Second, you’re getting options. Seven themed rooms and multiple difficulty levels mean you can match the experience to your group. That lowers the chance you end up in the wrong vibe.
Third, you’re getting a unique setting: it’s inside the Venetian’s Grand Canal Shoppes, and it includes a bar/lounge component. Even though drinks are extra, the ability to socialize before and after is part of the overall product.
So yes, it’s not a cheap impulse buy—but for a Vegas night where you want something interactive and not just passive entertainment, it can be a strong value.
Booking and Night-Of Tips That Save You Stress
A small amount of planning will make the experience smoother:
- Arrive early. The experience notes suggest arriving early and staying late for the full Vegas feel, and it gives you time to settle your team before the one-hour session begins.
- Confirm the room you want. One past booking reported that GetYourGuide didn’t show room selection and only offered the easiest option. If Zombie Outbreak or Casino Heist is the whole point for your group, verify room selection when you book.
- Check age limits by room. If anyone in your group might be under 18, pay close attention to the Morning After requirement.
- Bring English-ready expectations. The instructor is listed as English, so plan around that if your group needs translation.
- Use the lounge time well. If you want the bar to be part of your night, decide ahead of time whether you’ll drink before, after, or both. It’s easier than trying to negotiate it once you’re mid-planning.
Should You Book PanIQ Escape Room at The Venetian?
Book it if you want a Vegas activity that mixes story themes with hands-on problem-solving and doesn’t require a full half-day commitment. The small group size and the one-hour format make it a good fit for couples, groups of friends, and families where the age rules work.
Skip it—or at least double-check room selection—if your group cares strongly about choosing a specific room theme or difficulty. The one notable snag from prior experience was that a booking through GetYourGuide may not show which room you’re getting and might default to the easiest option. If that would annoy you, verify first.
If your goal is to spend an hour being clever together in a famous Strip location, with the option to linger afterward at the bar and lounge, PanIQ is the kind of plan that can turn a random night into a real memory.
]]>What I really like is the combination of driving time and the way the guides shape the experience. You get two hours behind the wheel plus a proper safety setup with helmets, water, and a clear set of rules. I also like the complimentary shuttle to and from the Las Vegas Strip, which keeps the day simple.
One drawback to plan around: this is messy off-road driving. You’ll want closed-toe shoes and clothes you don’t mind getting dirty, and the tour isn’t suitable for pregnant women or kids under 6.
Key Things To Know Before You Go
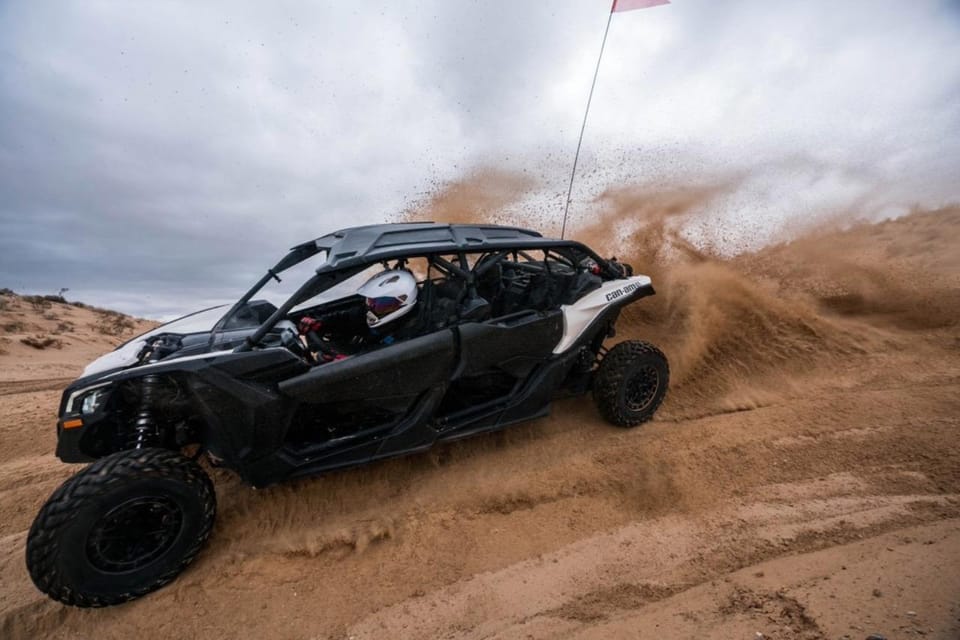
- You drive a Can-Am Maverick X3: top-of-the-line UTVs for the main event, with two hours behind the wheel.
- Big desert area (15,000 acres): you’re not confined to a small practice loop.
- Chase-your-guide format: you follow highly trained guides who know the desert terrain well.
- Provided gear and refreshment: helmets and water are included.
- Strip convenience: complimentary shuttle makes it easier than arranging your own transport.
- Rules matter: drivers must be 18+ with ID, and riders have specific age and fit requirements.
Driving a Can-Am Maverick X3 in Nevada, Not Just Watching
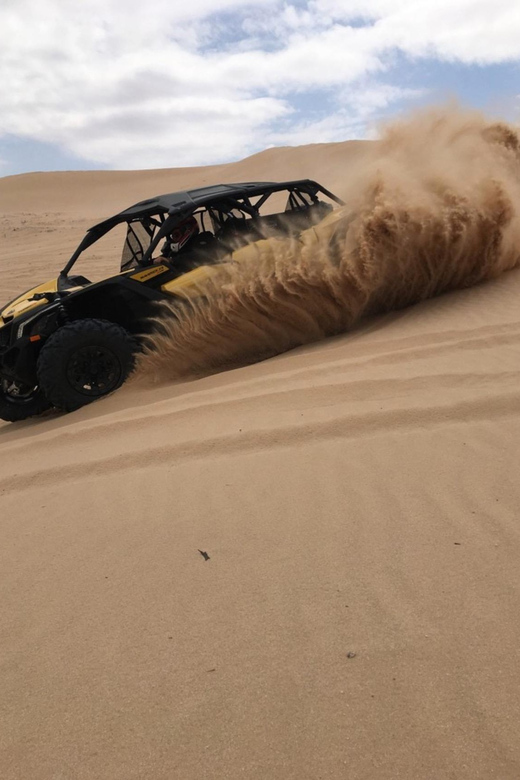
If you want Las Vegas to feel like more than lights and buffet lines, this is a strong switch. The core of the experience is straightforward: you drive a Can-Am Maverick X3 UTV while your guide leads the route across Nevada desert. The pitch is built around time and terrain. You’re not paying for a short demo. You’re paying for real seat time.
The other thing I like is that it’s guided in an authentic way: you’re chasing a guide who knows how the ground works. The Nevada desert isn’t one flat surface. It changes fast, and that matters when you’re driving a vehicle designed for off-road control, not smooth pavement.
The Complimentary Shuttle: A Quiet Win for Your Day
The tour includes a complimentary shuttle to and from the Las Vegas Strip. That might sound like a small detail, but in practice it changes the whole day.
Without a shuttle, you’d be stuck with the usual Vegas choices: rideshare timing, traffic, parking, and who’s driving back if you get picked up late. With a shuttle, you can treat this like a true half-day plan: show up, get geared up, drive, then return.
It also helps you stay focused. When your transport is handled, you can spend your energy on the parts that matter: getting ready for off-road driving and listening to the guide’s instructions.
What the Gear and Rules Tell You About the Experience
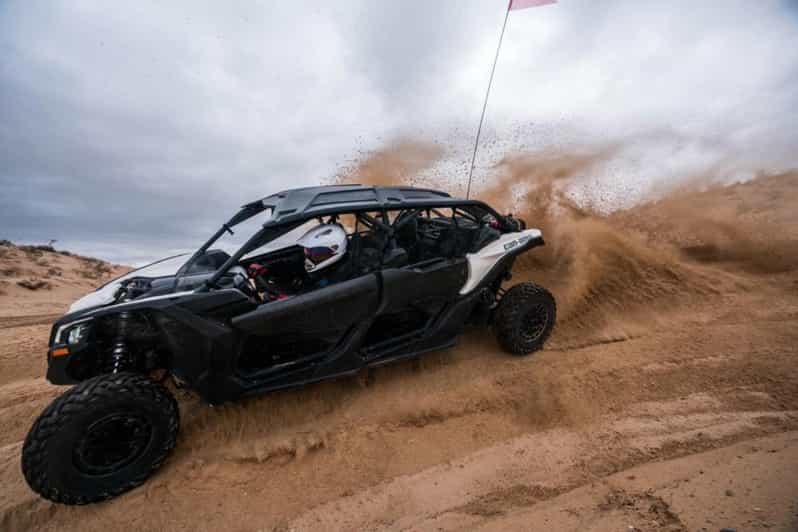
This tour gives you two practical pieces of support: helmets are provided and water is included. That’s not glamorous, but it’s exactly what you want for desert driving. You’ll be moving through heat and uneven ground, so hydration and proper head protection aren’t optional.
Now, read the rules closely before you assume you’re just showing up in sneakers and winging it. Here are the key requirements you must meet:
- Drivers must be 18 years or older and bring a valid ID.
- Everyone must bring an ID.
- You need a debit or credit card with you.
- Closed-toe shoes only. Sandals and flip-flops are not allowed.
- Wear clothes you don’t mind getting dirty.
- The tour won’t accept customers under the influence.
- Kids: only children 6 and older can ride if they can sit properly with their back touching the seat and feet touching the floor.
- Not suitable for pregnant women.
That last bullet is a big one. Even if you love adrenaline, this tour is built for off-road motion and bumpy terrain. If you’re pregnant, this is not the right fit based on the operator’s stated limitations.
Two Hours Behind the Wheel: Rock, Sand, and Washed-Out Terrain
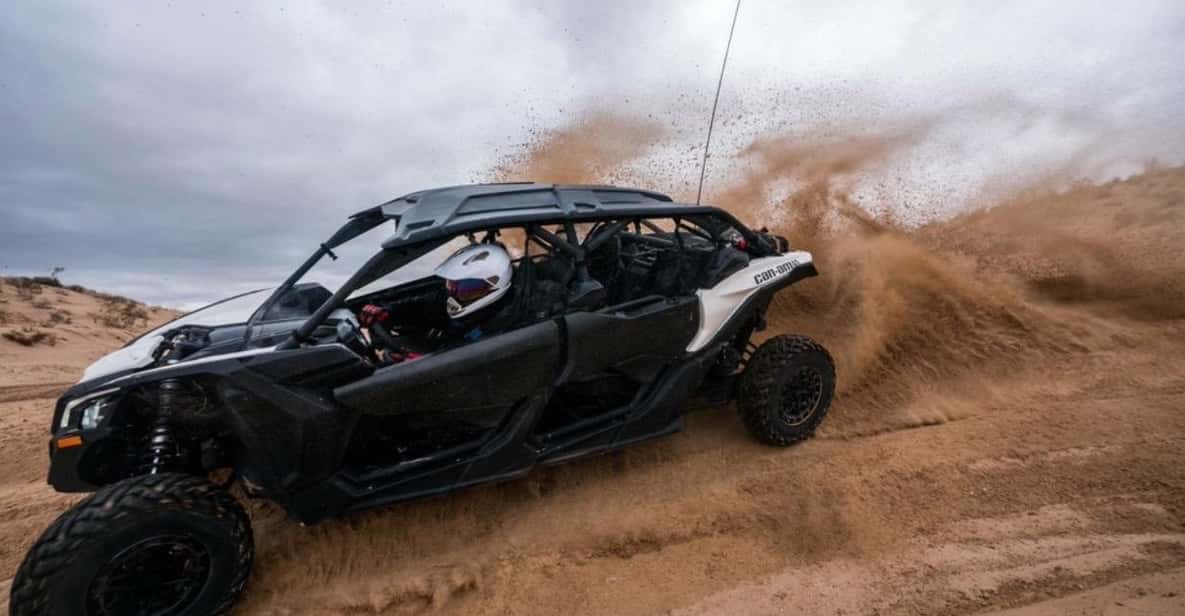
This is the main event, so let’s translate the terrain list into what you should expect to feel as a driver. The guides take you through multiple Nevada desert surfaces during your two hours behind the wheel. The terrain types listed are:
- Rock climbs
- Sand dunes
- Rock washes
- Sand washes
Rock climbs: technique over fear
Rock climbs usually mean uneven ground with traction changes. Your job is to follow the guide’s line and keep control. Expect the driving to feel more technical than straight cruising. If you’re new to off-road vehicles, you’ll probably rely heavily on smooth throttle control and careful steering.
Sand dunes: power plus patience
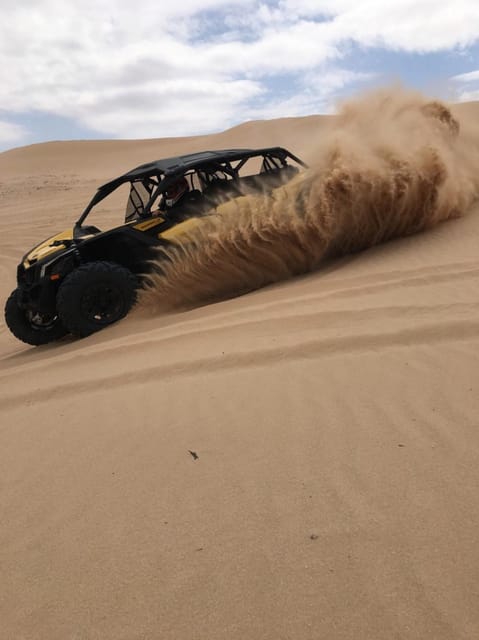
Sand dunes are where a lot of people find out whether they like the “work” part of off-road driving. Sand can be soft, so the vehicle reacts differently than on hard-packed trail. The best part is that dunes can feel playful when you’re confident, but you still need to pay attention and avoid rushing.
Rock washes and sand washes: bumpy, changing, and real
Rock washes and sand washes often mean channels where the ground has been shaped by water flow. You can get dips, uneven ridges, and scattered traction. This is where the guided format helps, because your guide is choosing routes based on what the land can handle and what the vehicle can do.
The Guide Lead: Chasing the Route Without Losing Your Mind
The activity is built around a simple idea: you chase your guides through the desert. That might sound intense, but the tour emphasizes that the guides are highly trained and know the Nevada desert well.
That matters because desert driving isn’t just about speed. It’s about spacing, staying aware, and following safe routes over surfaces that can change quickly. When you have a guide who understands the terrain, you spend less time guessing and more time actually driving.
Also, the tour is offered with a live tour guide in English, so you can ask questions and follow instructions without language barriers. One of the reviews specifically calls out Brandon as a great guide, and that lines up with what you want most from off-road instruction: clear direction and calm confidence.
How Much Time Do You Really Get to Drive?
The headline number is simple: 2 hours behind the wheel. That’s a big deal in this category because off-road tours sometimes spend more time transferring and gearing up than driving.
Here, the core value is placed on driving time. In a place like Nevada, two hours can feel like a full adventure session. You’ll have enough time to get comfortable with how the UTV moves over rocks and sand, and still leave with energy instead of fatigue.
Your overall time on the ground will also include the shuttle ride. Since the tour includes shuttle service, you don’t have to build extra time for transportation yourself. You do, however, want to plan for a full trip day.
Price and Value: What $399 Covers (and What to Check)
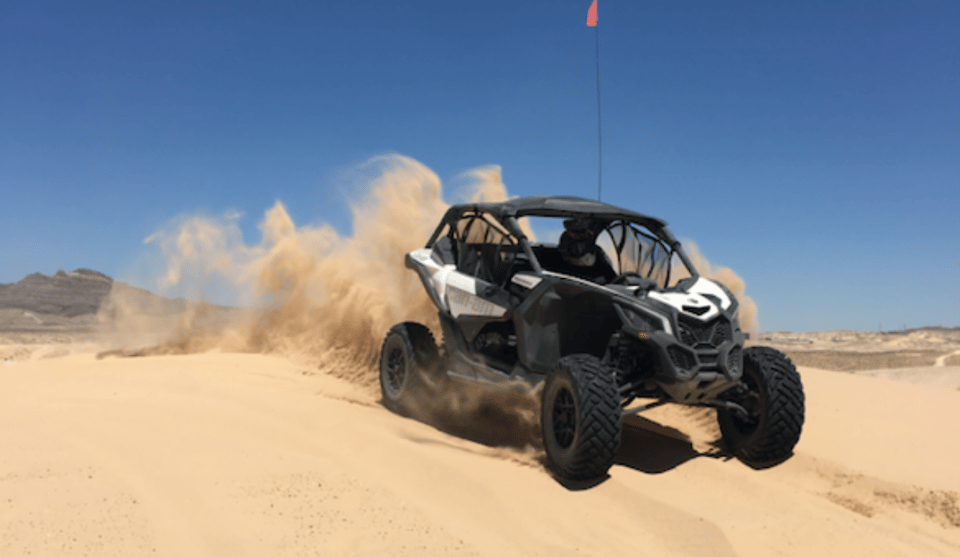
The price is listed at $399 per group (up to 1). That wording can be confusing, so here’s how I’d think about value.
You’re paying for:
- A Can-Am Maverick X3 with you driving
- 2 hours behind the wheel
- A live English-speaking guide
- Helmets provided
- Water included
- Complimentary shuttle to and from the Las Vegas Strip
In other words, you’re not just buying access to a vehicle. You’re buying guided off-road time plus basic rider essentials plus transport. For many people, the shuttle and gear inclusions are what make the math work. You avoid add-ons that can quietly inflate the total cost.
One practical check: because the listing mentions price per group and “up to 1,” confirm how they define your booking size. If the cost doesn’t drop the way you expect when more people join, it may change the best value for your group.
Who This UTV Adventure Fits Best
This tour is a solid choice if you want:
- A true guided off-road driving experience, not a spectator ride
- Plenty of time at the wheel
- A Nevada desert route described through real terrain types: rock climbs, sand dunes, rock washes, sand washes
- A plan that’s easier from Las Vegas thanks to the complimentary shuttle
It also works well for couples or friends who agree on one thing: you want to drive something fun and capable while a guide handles the route.
If you’re the kind of traveler who likes learning how a place feels, this is one of the better ways to experience Nevada beyond the Strip. The desert is the star, and you’re doing the starring role inside the UTV.
Who Should Skip It (or Re-think It)
I’d skip this tour if any of these apply:
- You’re pregnant, since it’s listed as not suitable
- You’re traveling with kids under 6
- You can’t meet the closed-toe shoes rule
- You’re not able to follow the basic safety requirements and the rule about not driving under the influence
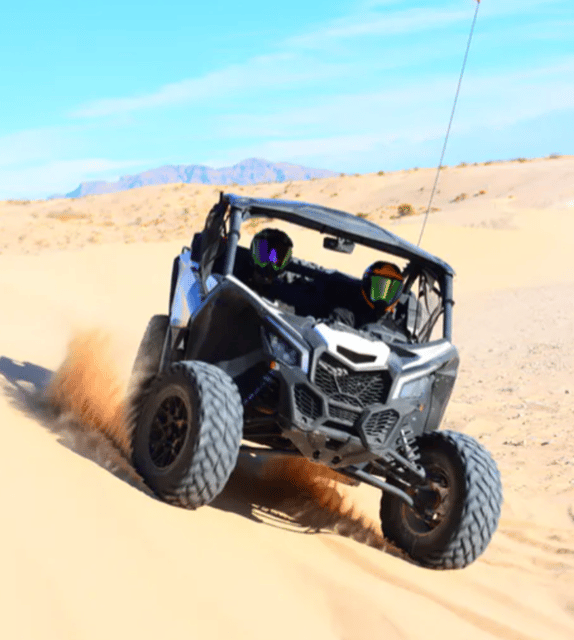
Also, if you dislike getting dirty or you hate bumpy motion, take the warning seriously. The activity requires clothes you don’t mind getting dirty, and that fits the terrain. This isn’t a polished, dry-luxury experience.
A Realistic Take on What You’ll Enjoy Most
The best moments here tend to come from when you’re actually driving through different desert surfaces back to back. Rock climbs feel different than sand dunes. Wash areas feel different again. That variety is what keeps a two-hour UTV session from feeling repetitive.
And the other big enjoyment factor is the guided “chase” setup. When the route is led by someone who knows the terrain, you can relax into the driving and focus on being smooth and attentive instead of trying to read the desert yourself.
One more thing: the reviews rate the experience very highly, and one name stands out—Brandon is mentioned as great—so you can reasonably expect the guide experience to matter here. A good off-road guide doesn’t just lead. They help you feel in control.
Should You Book This Las Vegas UTV Tour?
If you want an off-road day that’s mostly about driving, this is a strong pick. The blend of two hours behind the wheel, a Can-Am Maverick X3, helmets and water included, and the complimentary shuttle makes the day feel efficient from Las Vegas.
I’d book it if you:
- Meet the age and ID requirements
- Can wear closed-toe shoes and don’t mind getting dusty
- Are excited by rock, sand, and wash terrain
I’d pass or look for a different option if you:
- Need something gentler or more wheelchair-friendly (this one isn’t stated as such)
- Can’t meet the clothing/shoe rules
- Are pregnant, or you’re traveling with a child not eligible under the stated minimum age and seating requirements
If your goal is simple—drive a capable UTV in Nevada desert with a real guide—this one delivers.
FAQ
How long is the guided UTV adventure?
It runs for 2 hours.
What UTV will I drive?
The tour uses Can-Am Maverick X3 UTVs.
Does the price include a shuttle from the Las Vegas Strip?
Yes. There is a complimentary shuttle to and from the Las Vegas Strip.
Are helmets and water included?
Helmets are provided, and water is included.
Who can drive the UTV?
Drivers must be 18 years or older and have a valid ID.
Can children ride?
Children six years old and older can ride if they can sit properly with their back touching the seat and feet touching the floor. The tour is not suitable for children under 6.
What should I bring?
Bring your passport or ID card, and a debit or credit card. Wear clothes that can get dirty and closed-toe shoes.
What kind of shoes are required?
Closed-toe shoes only. Sandals or flip-flops and open-toed shoes are not allowed.
Is the tour suitable for pregnant women?
No. It’s listed as not suitable for pregnant women.
What is the cancellation policy?
You can cancel up to 24 hours in advance for a full refund.
]]>I especially like the 90-minute guided ride through cactus-filled desert trails—long enough to feel the terrain, not so long you’re exhausted. The second big win for me is the live guide commentary about the history of the area, which turns the ride into more than just speed and dust.
One consideration: you’re in an outdoor setting on an ATV, so this isn’t a good match for everyone. No sandals or flip-flops are allowed, and the tour isn’t suitable for children under 18 or pregnant women.
Key Highlights You’ll Care About
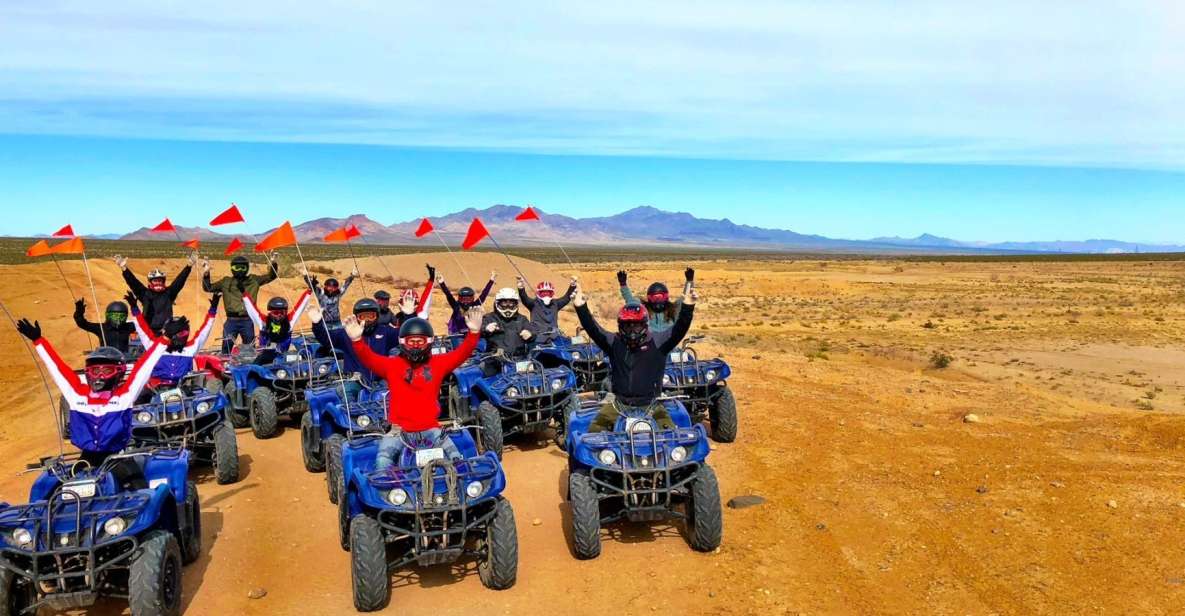
- Private trail access not open to other companies or the public
- New 2026 Polaris ATVs for your ride
- Safety debriefing before you head out
- Live English guide with history-focused commentary
- Photo opportunities built into the experience
- 90 minutes riding within a 210-minute total outing, thanks to shuttle pickup
Getting Out of Vegas: The Mandalay Bay Area Pickup Makes It Easy
This tour is built around a simple idea: you shouldn’t waste your Las Vegas time stuck in traffic or scrambling for directions. You’ll get picked up from the Souvenir Outlet across the street from Mandalay Bay at 3961 S Las Vegas Blvd. There’s no parking at the meeting point, so plan to be dropped off.
From there, you’re headed west toward the Mojave Desert. The timing can vary by pickup schedule, and you’ll be given the exact pickup time after you reconfirm with the local operator. For me, that matters because the most annoying part of “near Vegas” tours is usually waiting around; this one keeps you in a structured flow from hotel area to trail time.
Also, you’ll need a printed voucher for check-in. It’s old-school, but it prevents delays.
The 2026 Polaris ATV Start: Safety, Comfort, and First-Time Confidence
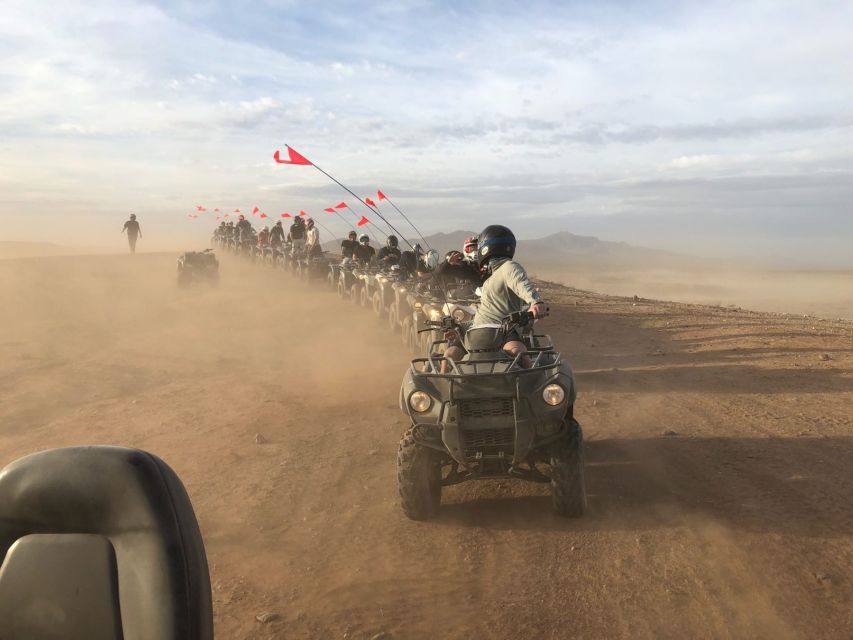
Before the riding begins, you get a safety debriefing. That’s not just a box-check—on ATVs, the early lessons make the rest of the ride feel smoother and more controlled. You’ll also learn how to operate the ATV before you head out on the guided trail.
Even if you’ve never ridden before, the tour’s format is set up to help you get moving. One key detail from the experience is that the guide actively coaches riders who hesitate. A past rider named Dain was described as an amazing guide who wouldn’t let the rider quit when they wanted to stop. He offered pointers that helped them keep going—exactly the kind of hands-on coaching you want if you’re new to the machine.
That coaching focus is one of the reasons I think this ATV tour is a strong choice for beginners who still want a real adventure. You’re not just being shown a vehicle; you’re being taught how to use it confidently.
90 Minutes in the Mojave Desert: Cactus, Sand, and a Real Trail Feel
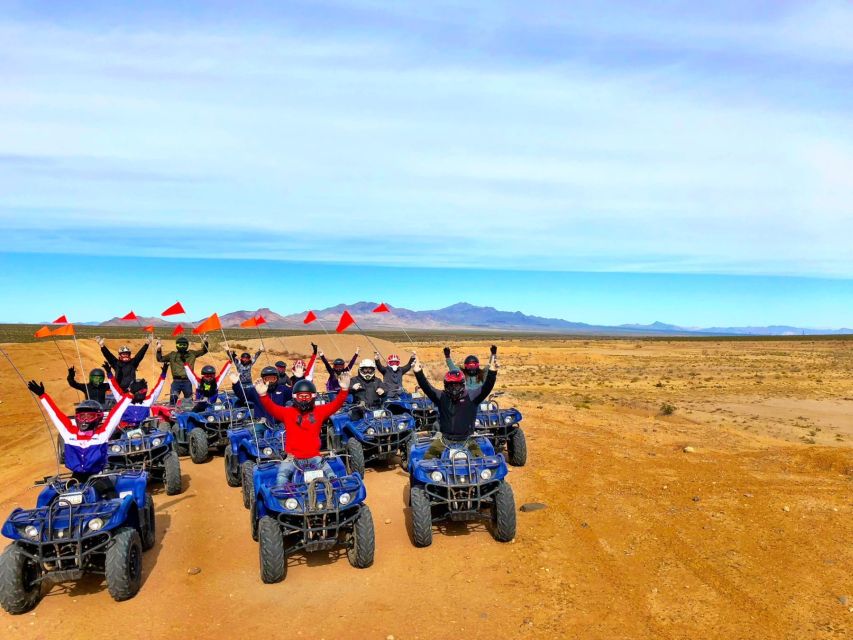
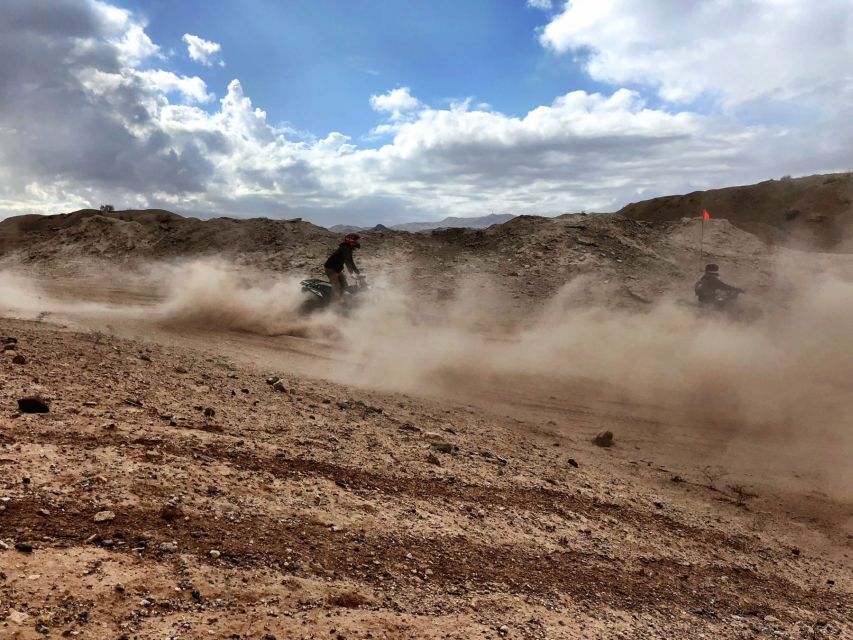
The core of this experience is the 90-minute guided ATV ride through the Mojave Desert trails. This isn’t a quick demo loop where you barely feel the terrain. It’s long enough to notice how the sand behaves, how the bike responds to turns, and how the desert opens up as you ride.
You’ll pass through cactus-filled terrain under clear desert skies, and you’ll spend real time away from the neon lights. The ride is guided, so you’re not worrying about where to go next. Instead, you can focus on the fun part: controlling the ATV over sandy stretches and staying balanced on turns.
There’s also an important detail that affects the feel of the ride: you’ll have exclusive access to a private trail that’s not open to other companies or the public. That matters because it changes the vibe. You’re more likely to feel like you have space to breathe and ride rather than sharing the same crowded routes with everyone who booked a similar tour.
Where the History Comes In: Your Guide Talks Vegas and the Desert Story
This is one of the most underrated parts of booking an ATV tour: not everyone adds real context, and without it, you can end up with an activity that feels like just motion.
Here, the guide provides live commentary in English about the history of the area as you travel. That means you’re hearing explanations while you’re actually moving through the desert. It turns roadside scenery into something you understand, even if you only catch a few key ideas during the ride.
It also pairs nicely with the physical experience. The desert can look stark and simple from a distance, but when someone explains what shaped the region—how people moved, settled, and used the land—it makes the cactus and sand feel more specific, not generic.
Photo Stops and Timing: How the 210 Minutes Work in Real Life
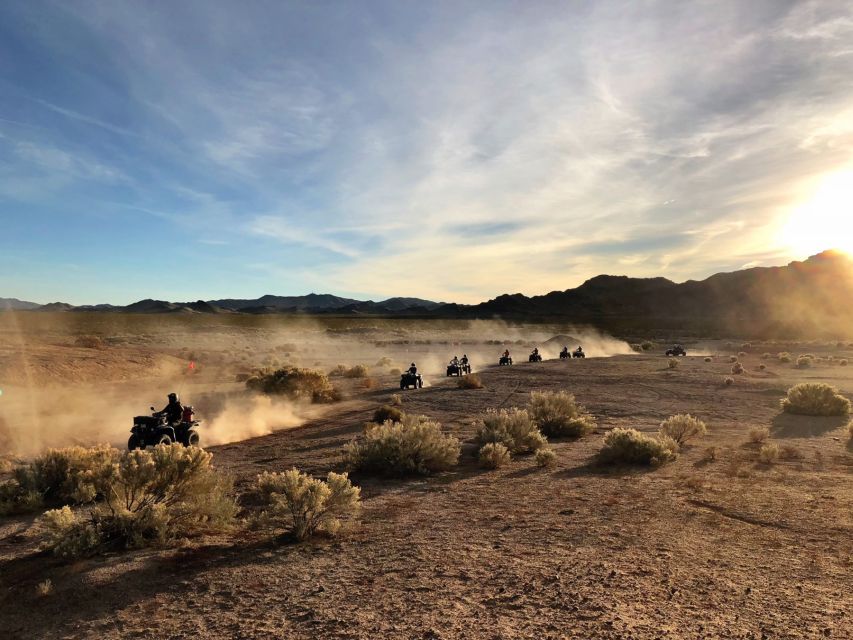
The total outing is listed as 210 minutes, which includes pickup and the ride. The riding itself is 90 minutes, so the rest of the time is accounted for by getting you from the Las Vegas area to the trail zone, plus the safety briefing and photo moments.
You’ll have photo opportunities throughout the tour, which is helpful if you want more than one souvenir shot. It’s also a good way to pause and reset your body after the more intense stretches of riding.
If you’re the type who hates feeling rushed, this format usually works well. You’re not spending the whole day in a van, either. You’re doing a focused adventure window: get on, learn, ride, photograph, then return.
What You’ll Need to Bring (and What Will Get You Turned Away)
ATV tours are practical in their rules, and this one is clear about what to bring and what not to wear.
Bring:
- Passport or ID card
- Driver’s license
For clothing, the big rule is footwear. Sandals or flip-flops aren’t allowed. That’s not just for safety theater. The desert is dusty, the ATV can throw grit, and you want stable footing when you’re mounting and dismounting.
Also, alcohol and drugs are not allowed. You’ll be operating an ATV, and the tour is designed as a guided outdoor adventure, not a party setting.
One more note: the tour is live guided in English, so if you prefer your sightseeing explained in a single language without translation, this is straightforward.
Price and Value: Is $200 Worth a Mojave ATV Ride?
The price is $200 per person. That sounds like a “big activity ticket,” but the value depends on what you’re comparing it to.
Here’s what you’re paying for:
- A guided 90-minute ATV ride
- A safety debriefing and instruction on operating the ATV
- Live English guide commentary during the ride
- Roundtrip shuttle service from the Mandalay Bay-area pickup point
- New 2026 Polaris ATVs
- Photo opportunities during the experience
- Private trail access not open to the public or other companies
If you’ve ever tried to DIY an ATV rental, you know how much hassle that adds: finding a place to go, dealing with rental terms, arranging transport, and figuring out routes. This tour collapses those problems into a single package—especially with the shuttle pickup.
I’d say $200 is reasonable if you want the full adventure package: vehicle + guide + time riding + transportation support. If you’re mainly curious about the experience but don’t care about riding for 90 minutes, you might be able to find cheaper options elsewhere. But if you want a true Mojave Desert ride with structured coaching, this price starts to look fair.
Who This Tour Fits Best (And Who Should Skip It)
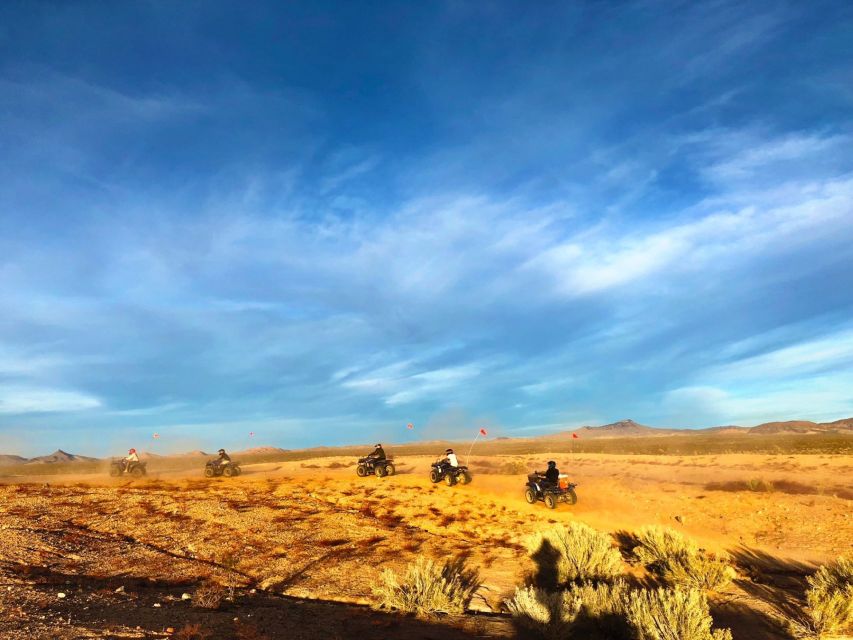
This ATV tour is geared toward riders who want a guided outdoor experience near Las Vegas. It’s especially well-suited for:
- People who are excited to ride but still want coaching before and during the ride
- First-timers who would appreciate encouragement and practical tips (the guide coaching style is a standout)
- Anyone who wants to trade Strip time for desert air and sandy terrain
It’s not suitable for:
- Children under 18
- Pregnant women
Those restrictions matter because ATV riding has physical demands and safety considerations. If any of those apply to you, it’s better to save your energy for a different kind of desert activity.
The Big Takeaway: You’re Buying a Guided Desert Day, Not Just a Ride
The best way I’d describe this experience is that it’s a guided Mojave Desert outing with enough ride time to feel like you actually left Las Vegas behind. The combination of private trail access, a new Polaris ATV, and live history commentary makes it more satisfying than a simple “go fast, come back” format.
And if you’re nervous about riding, the coaching approach stands out. A rider experience tied to the guide Dain highlights how instruction and encouragement can change the outcome for a first-time rider who feels like quitting. That tells me the guide team isn’t just herding people along; they’re invested in helping riders move through the experience with more confidence.
Should You Book This Mojave ATV Tour?
Book it if you want:
- A structured, guided 90-minute ATV ride
- Easy roundtrip shuttle pickup near Mandalay Bay
- New 2026 Polaris ATVs
- A guide who gives live English commentary and helps riders get comfortable
Skip it if:
- You want a super short activity with minimal time on transport
- Your group includes riders who fall under the under-18 or pregnancy restrictions
- You don’t want to follow the footwear rule (no sandals/flip-flops)
If your goal is a real outdoor adventure just outside Las Vegas, this is a strong pick. You’ll trade neon for sand, learn the ATV basics, and come back with a story that feels like you actually went somewhere.
FAQ
How long is the tour in total?
The total duration is listed as 210 minutes. The ATV riding portion is 90 minutes.
Where do I get picked up for this ATV tour?
Pickup is from the Souvenir Outlet across the street from Mandalay Bay, at 3961 S Las Vegas Blvd. There is no parking, so you’ll be dropped off.
What type of ATV will I ride?
You’ll ride New 2026 Polaris ATVs.
Do I need a printed voucher?
Yes. A printed voucher is required.
What should I bring for check-in?
Bring passport or ID card and your driver’s license.
Are sandals allowed?
No. Sandals or flip-flops are not allowed.
Is food included?
No. Food is not included.
Is the tour guided in English, and is it wheelchair accessible?
Yes. The tour guide is English-speaking, and the activity is listed as wheelchair accessible.
]]>What I like most is the chance to pair romance with scary-cute atmosphere, plus the outside photo spots that end up being some of the best shots.
One thing to plan for: if you want a legal wedding, the Clark County marriage license and the $60 licensed officiant fee are not included, so you’ll want to budget those extras.
Key things to know before you go
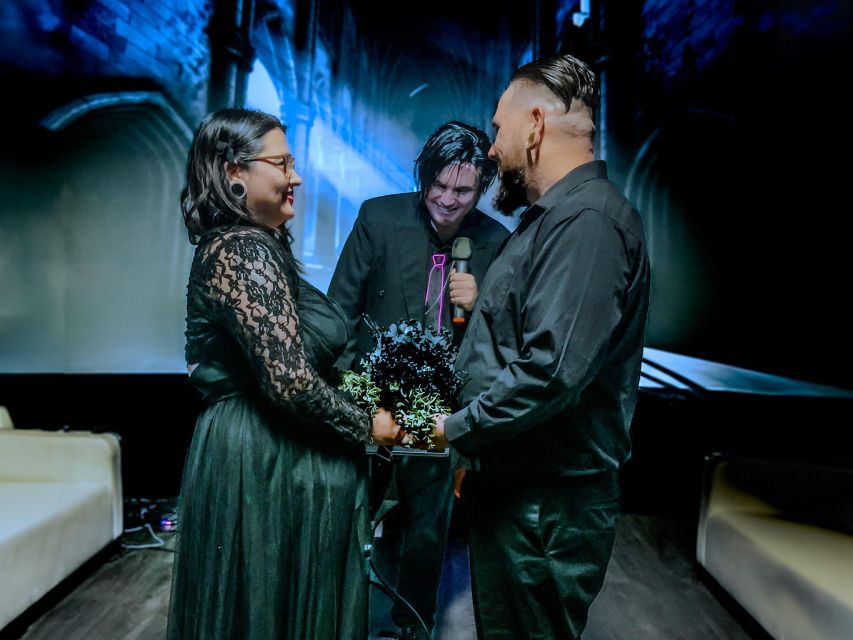
- Halloween HD video + soundscapes that set the tone fast, without long setup.
- Professional photography as part of the package, with extra candid digital photos available.
- Unlimited photos and videos for you and your guests, plus fun props and a grand flower wall.
- A personal wedding coordinator and a witness included if you need one.
- English-led ceremony with slower pacing for international couples, plus coordinator support in Spanish.
- Up to 14 guests included (with upgrades for more), which is great for small groups.
A haunted-house chapel that actually feels wedding-ready
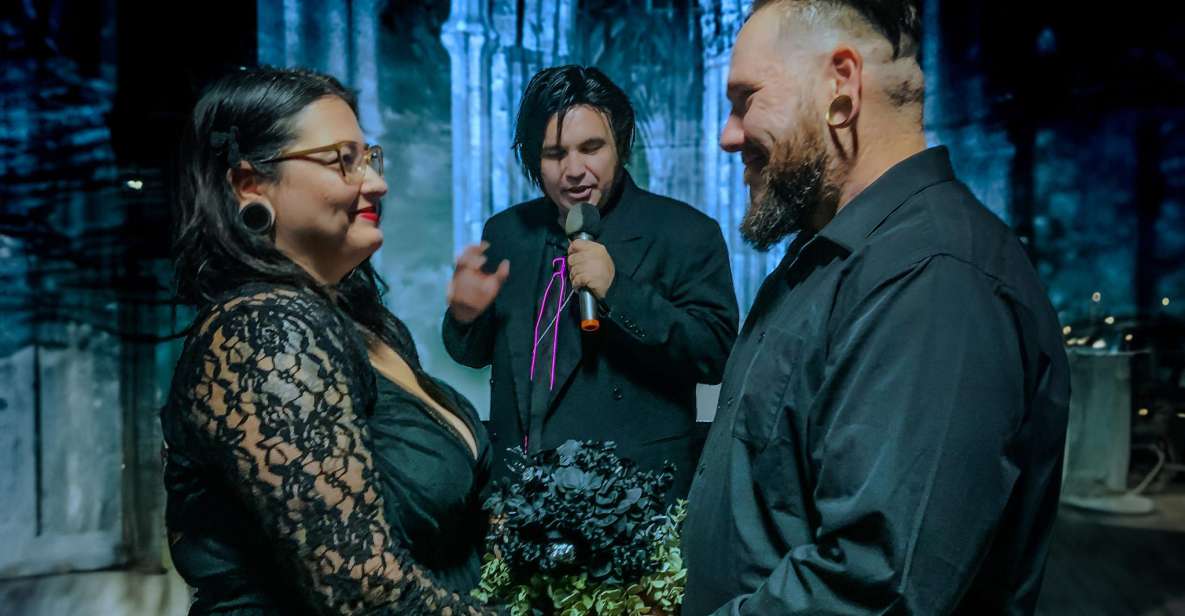
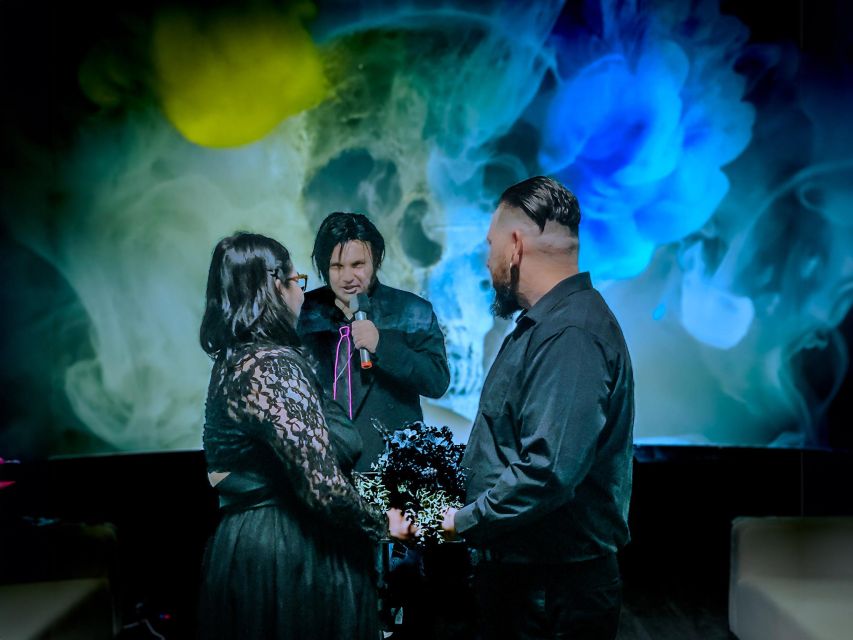
Las Vegas has a talent for theme. This one takes the Halloween idea seriously, but keeps it usable for real couples who want vows, photos, and a smooth experience. The chapel is designed to feel like you stepped into a haunted Halloween world, with wall-to-wall HD video and soundscapes doing much of the heavy lifting for atmosphere.
The vibe lands in a sweet spot: spooky enough to feel memorable, but not so chaotic that you lose the emotional parts. If you’re planning a vow renewal, an engagement ceremony, or a commitment ceremony, this style works because you’re not stuck in formal ritual for hours. If you’re getting married legally, it’s still a straightforward, timed ceremony.
The best part is that the theme doesn’t replace the wedding. It supports it. You still get vows, ring moments, music, and a keepsake certificate. The horror is mostly in the lighting and the visuals.
Your 45 minutes: how the ceremony plays out
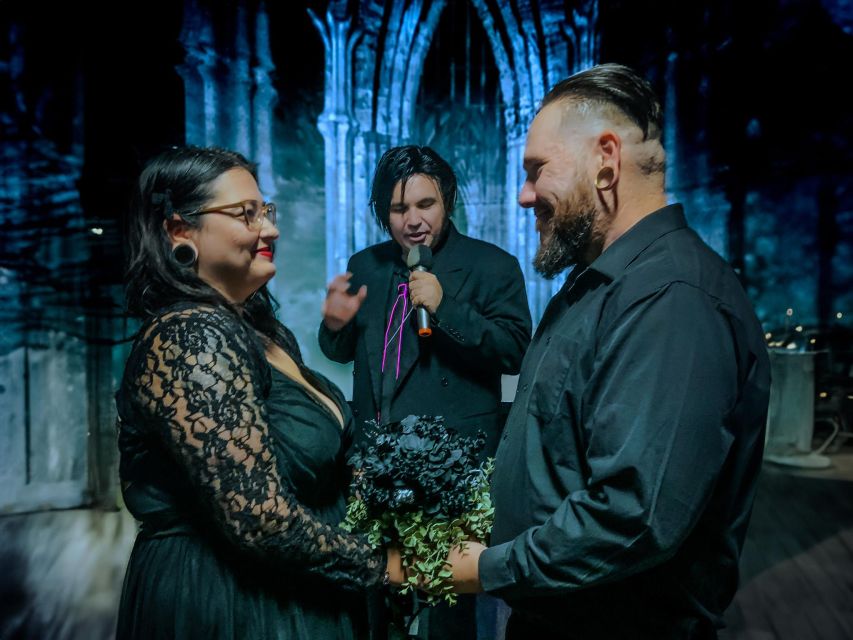
The total experience runs about 45 minutes, and that matters in Vegas. You can fit this around dinner plans, a show, or a quick honeymoon detour.
Here’s the rhythm you can expect:
- You check in and get settled for the ceremony space.
- You and your party take your seats on comfortable modern white sofa seating with USB chargers (nice touch if you want your phone ready for photos).
- A personal wedding coordinator helps guide the flow, including making sure the witness is covered if you need one.
- The ceremony itself includes standard theme aisle music, plus the haunted-house Halloween presentation through HD video and soundscapes.
- You exchange vows and rings as part of the ceremony format, and the moment is captured professionally.
- After the ceremony, you receive a keepsake ceremony certificate and you can lean into photos with props and the flower wall area.
If you’re planning as an international couple, you’ll be in good shape. All ceremonies are conducted in English, and the officiant speaks slower since it’s a private event. The wedding coordinator also speaks English and Spanish, which can reduce stress if you need clarification.
Also, if you’re using a legal setup versus a non-legal one, your experience is still ceremony-focused. The biggest difference is what paperwork you need beforehand (more on that below).
The haunted Halloween visuals: what makes the photos feel cinematic

The chapel’s Halloween world is built with wrap-around HD video and soundscapes. That means the spooky mood isn’t just a backdrop. It moves with the ceremony so your vows don’t happen in a plain room.
In practice, that gives you two benefits:
- Your photos look like a scene, not a snapshot.
- Your guest experience feels more like an event, even if it’s a quick ceremony.
The ceremony also gives you built-in photo opportunities. There’s a grand flower wall for photos, and there are fun photo props you can use. You and your guests can take unlimited photos and videos, which is a big deal because it lets you do your own experimenting with angles and timing.
Then there’s the part couples tend to love most: you get great chances for outside photos too. One of the recurring themes is that those exterior shots can surprise you with how good they end up looking. That matters because people often worry that a themed indoor chapel will mean flat photos. Here, you’re getting options beyond the main ceremony set.
If you’re the kind of couple that likes photos but hates feeling rushed, this structure helps. You still have a 45-minute ceremony, but you get time built in for the fun photo moments.
Photography that’s included, plus room for your own camera
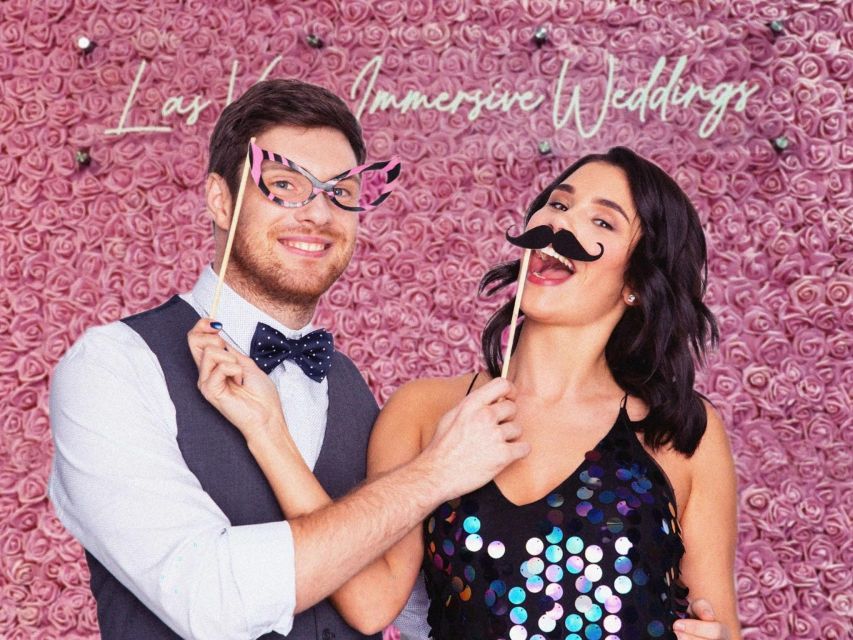
Photography here isn’t an afterthought. It’s part of the core package.
What’s included:
- Professional photography during the ceremony.
- 5 candid digital photos included.
- You also get a chance to use the photo wall and props, and you can take unlimited photos and videos yourself.
There’s also a practical perk: you can bring your own professional wedding photographer at no extra charge. That’s a relief if you already hired someone back home and you don’t want to lose their style or coverage.
One more thing: because you’re allowed unlimited personal photos, you don’t have to worry about one person “sacrificing” the experience to shoot everything. Between the pro coverage and your own camera time, you can do both: candid chaos and clean keepsakes.
Optional upgrades exist as well. They’re offered for an extra cost, and you’ll need to request the upgrade list to see what’s available. Even without upgrades, the included candid digital photos give you something concrete right away.
Value for money: $299 per group up to 16

The price is $299 per group up to 16, for a 45-minute ceremony. That pricing is worth thinking about because many wedding packages charge per person and quickly become expensive with guests.
In this case, your “cost per moment” is lower if you’re bringing more people. And because the package includes a personal coordinator, a keepsake certificate, witness support when needed, and the haunted Halloween presentation, you’re paying for a planned show, not just a room rental.
Two extra costs to remember:
- The $60 licensed officiant/minister fee is not included (for all ceremonies).
- A Clark County marriage license is only required for a legal wedding ceremony (not for vow renewals or other non-legal ceremonies).
So the best way to judge value is like this:
- If you’re doing a non-legal ceremony (engagement, vow renewal, commitment ceremony), you’re mostly paying for the show, the coordination, and the photo coverage.
- If you’re doing a legal wedding, you’ll want to add the license and officiant fee to your budget.
Also, the chapel includes up to 14 guests by default, with upgrades for additional guests. If you’re expecting a bigger group, it’s smart to confirm how that upgrade works before you plan your headcount.
Attire and costumes: simple rules, less stress

Good news: you don’t need special gear that you have to source last minute. Here are the rules that matter:
- The chapel does not provide costumes.
- You can wear whatever is comfortable and fits your theme, from wedding outfits to something more casual or spooky-inspired.
- They do not allow food and drinks, and alcohol and drugs are not allowed.
That’s it. No complicated costume requirements. You just choose your look and show up.
If you want to lean into Halloween, think subtle wins. A black suit, a red bouquet, a veil with a Halloween vibe, or themed accessories tend to look good on camera without turning the ceremony into a full costume event.
And if you’re bringing kids, it’s easier when everyone knows the focus stays on the ceremony and photo moments, not snacks and distractions.
Marriage license rules: when you need paperwork in Nevada
This part matters, so I’ll keep it clear.
- A non-legal wedding ceremony does not need a marriage license. That includes things like an engagement ceremony, vow renewal, or a commitment/love/friendship ceremony.
- A legal wedding ceremony does require a Clark County marriage license.
How to get the license (if you need it):
- You can obtain it at the Clark County Regional Justice Center.
- Hours run from 8:00 a.m. to 12:00 a.m. (midnight), 7 days a week.
- It’s recommended to fill out a pre-application at www.MLIC.Vegas.
- Both parties must be present with a valid government-issued photo ID (driver’s license or passport).
You’ll also want to remember the $60 licensed officiant/minister fee isn’t included.
If you’re unsure which ceremony type you’re booking, ask your coordinator. The wedding coordinator can help you guide through the process.
Where to park and how to find the chapel quickly
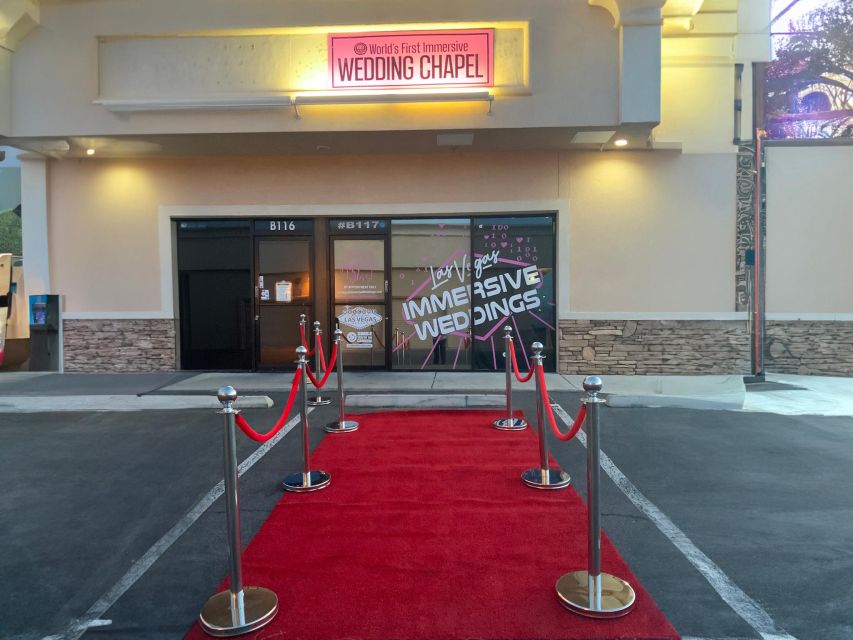
Location is super convenient if you’re already in the airport area. The chapel is in the same parking lot as PT’s Gold Pub on Sunset Rd, across from Harry Reid International Airport.
What you do:
- Park in that lot.
- Drive to the back building.
- Look for the unit with the large pink Wedding Chapel sign.
The address is 1641 Sunset Rd B117, Las Vegas, NV 89119.
You also get skip-the-line style help with an express security check. In Vegas timing, that can save your mood.
One practical tip: bring your ID (passport or ID card is required). And when you book, email the team at [email protected] for important details.
Who this haunted-house wedding experience is best for

This is a great fit if you want a Vegas wedding moment that feels themed, photographed, and easy to run.
It’s especially good for:
- Couples who love Halloween and want their ceremony to match the season.
- People planning a vow renewal, engagement, or commitment ceremony and want something more fun than a standard booking.
- International couples who appreciate English with slower pacing and coordinator support in Spanish.
- Anyone who wants pro photos without spending weeks planning décor and photo locations.
It might not be the best fit if:
- You want a long, traditional ceremony with a slow pace. This is designed for a 45-minute experience.
- You’re counting on the venue to supply costumes. You’ll need to bring your own attire or theme accessories.
Should you book this Las Vegas haunted-house ceremony?
If you want a memorable, Halloween-themed ceremony with a real photo plan, I’d say this is a strong choice. The HD Halloween set, the included professional photography, and the fact that you can take unlimited photos/videos yourself make it feel built for couples who care about how it looks.
It’s also a value-friendly setup because the base price is per group up to 16, with a coordinator and ceremony production included. Just do the math carefully if you’re going for a legal wedding, since you’ll add the officiant fee and the marriage license cost.
If your goal is a quick, fun, photogenic wedding moment in Vegas that doesn’t require big logistics, this haunted-house chapel checks those boxes.
FAQ
FAQ
What is the duration of the Haunted House Wedding Ceremony + Photography?
The ceremony experience lasts about 45 minutes.
How much does it cost and how many people can be included?
It’s $299 per group up to 16. Up to 14 guests are included, with upgrades available for additional guests.
Does a non-legal ceremony require a marriage license?
No. Engagement ceremonies, vow renewals, or commitment/love/friendship ceremonies are non-legal and do not require a marriage license.
What do I need for a legal wedding ceremony?
A legal wedding ceremony requires a Clark County marriage license. The officiant fee of $60 is also not included.
What photography is included in the package?
The package includes professional photography and 5 candid digital photos. Optional upgrades may add more.
Can I bring my own photographer?
Yes. You and your group can take unlimited photos/videos, and you can also bring your own professional wedding photographer at no extra charge.
Are costumes provided?
No. The chapel does not provide costumes, but you can wear whatever fits your theme and comfort level.
What language is the ceremony conducted in?
Ceremonies are conducted in English, with the officiant speaking slower for international guests. The wedding coordinator also speaks English and Spanish.
What should I bring?
Bring passport or ID. That’s the required identification information listed.
Where is the chapel, and how do I find it?
It’s at 1641 Sunset Rd B117 in the same parking lot as PT’s Gold Pub, across from Harry Reid International Airport. Drive to the back building and look for the large pink Wedding Chapel sign.
]]>I especially like the mix of angles: forward-facing seats with 180-degree panoramic views from the air, followed by calm, smooth rafting where you can actually look around and take photos without holding your breath. I also love that the day doesn’t feel rushed in one direction only—you get narration in the sky, then stops at quiet river beaches for swimming or paddling.
The main drawback to consider is that this is a long, early-to-late day with limited physical flexibility. It’s not suitable for people with back problems or wheelchair users, and if you’re over 250 lbs you’ll need an extra seat.
Key things to notice before you go
- Small group (up to 6): fewer people, less chaos, more time to hear pilot and guide commentary.
- A classic big-dam start: your day kicks off at the base of Hoover Dam and the Bypass Bridge.
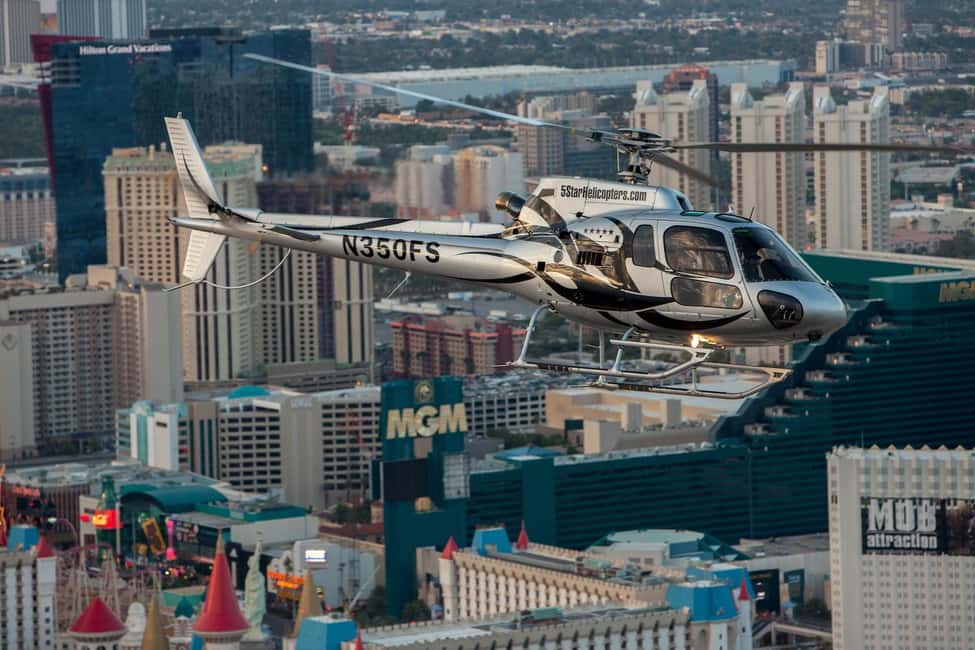
- Helicopter layout built for sightlines: forward-facing seats plus 180-degree panoramic views.
- Fortification Hill on the flight path: an extinct and active-volcano area the pilot points out by name.
- Rafting that’s smooth, not white-knuckle: 14 miles of guided float on calm water with swim/paddle stops.
- Willow Beach wrap-up: you’ll finish at the Arizona side with a chance to shop and grab souvenirs.
How the day flows: from hotel pickup to air and river
This is a true “one-day double feature.” You’ll be picked up from most Strip-area hotels in Las Vegas, then shuttled by coach toward the flight operation. Pickup timing is typically 45 minutes to 1 hour before departure, and you’ll want to be ready to move fast—your day runs on a schedule, and check-in happens about 30 minutes prior to the helicopter departure.
From there, the route splits into two phases. First comes the helicopter flight, tied to landmarks around Hoover Dam and the Grand Canyon. After the flight, you’re taken to the Hoover Dam Lodge in Boulder City to begin the river part at the dam.
The value of this structure is simple: you don’t waste time sightseeing in between. You get the aerial “wow” first, then the slower, hands-on river time right after—so the day feels like it has two different moods instead of one long, repeating drive.
Strip pickups and the coach ride: keep your phone charged
The tour includes transportation to and from your Las Vegas hotel, and the pickup list is long. If your exact hotel isn’t listed, you pick the closest option and the company confirms your pickup spot and time the day before.
Plan your day around one key reality: this tour starts from the Strip but spends most of your time off it. That means you’ll want:
- comfortable clothes you can move in
- sunscreen you can reapply
- a way to keep your camera handy (you’ll use it)
The coach time is about 30 minutes, then you transition to the air part. After the helicopter lands back at Harry Reid Airport, there’s another transfer (including a bus/coach ride of about 1 hour) before you reach the river launch area.
Helicopter route: Hoover Dam, Bypass Bridge, Black Canyon, and Colorado River views
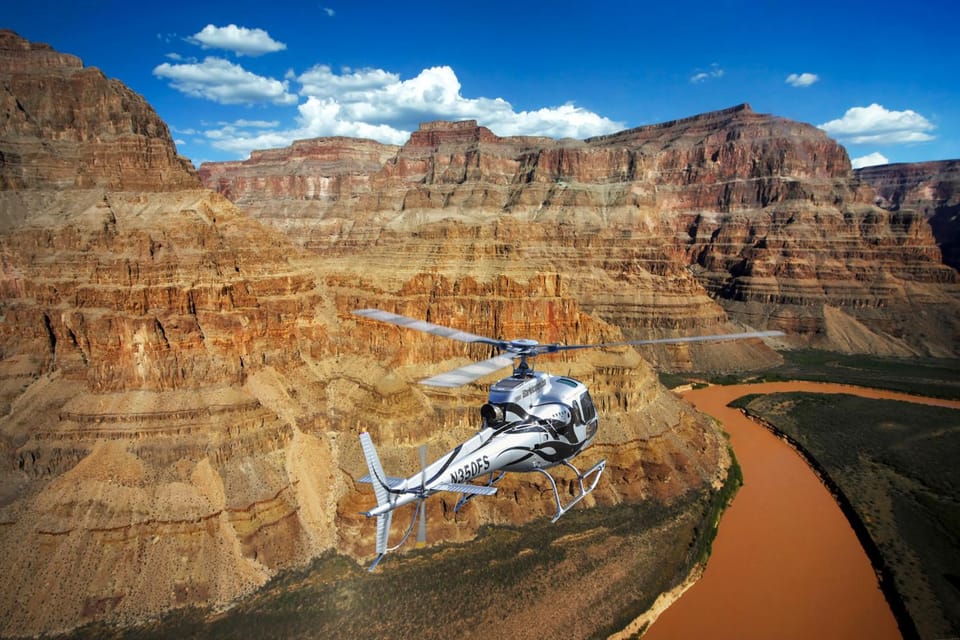
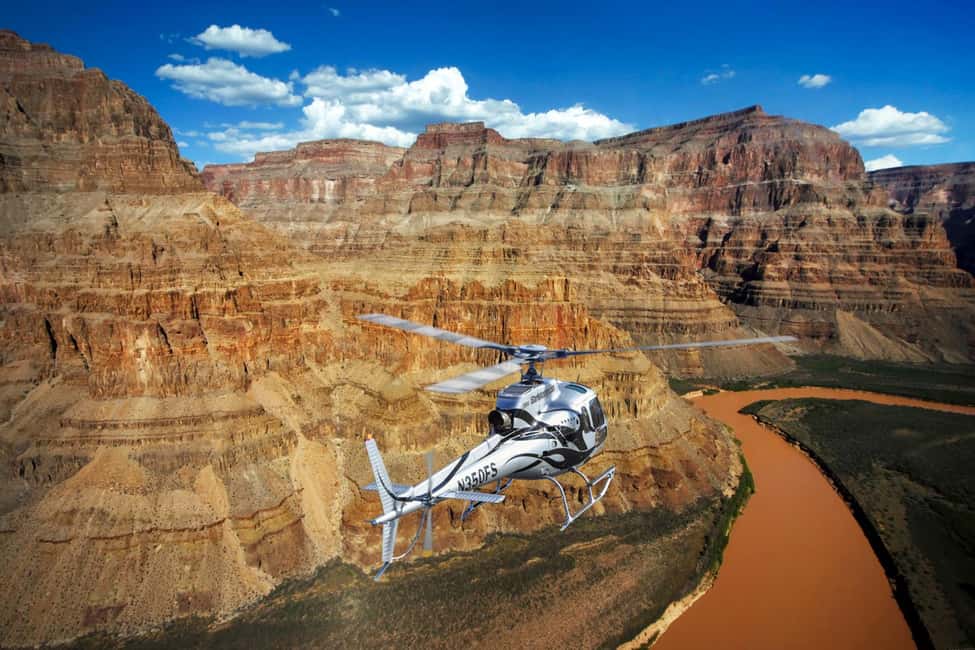
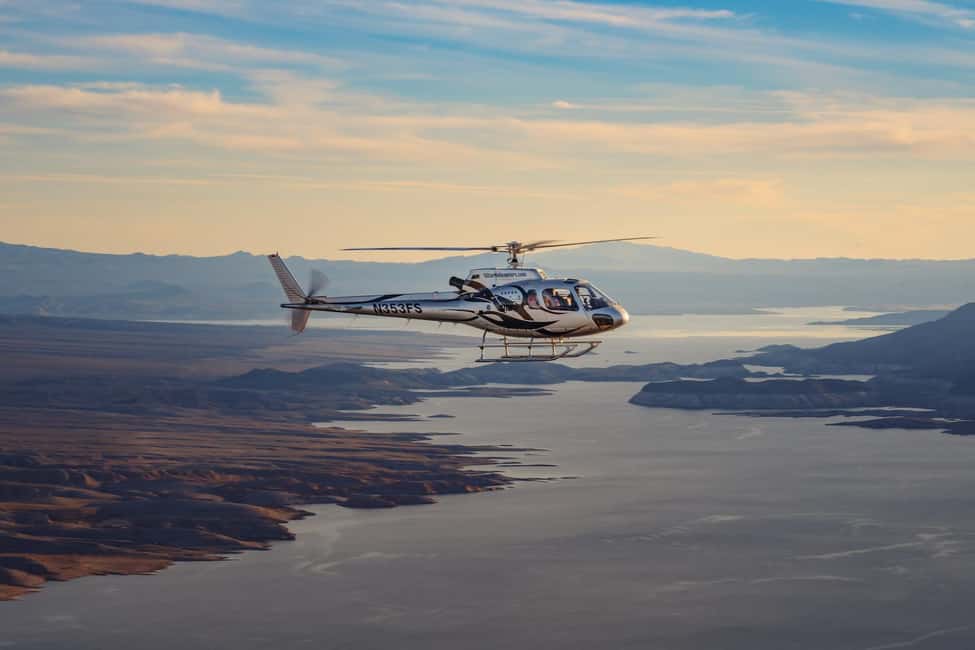
The helicopter portion is the headline. You’ll be in a 5-star Grand Canyon helicopter with forward-facing seats designed for viewing, plus 180-degree panoramic views. That matters because it affects how you photograph and how you experience the scenery. Instead of craning around, you can keep your attention forward and still catch what’s off to both sides.
Early in the flight, you’ll soar over:
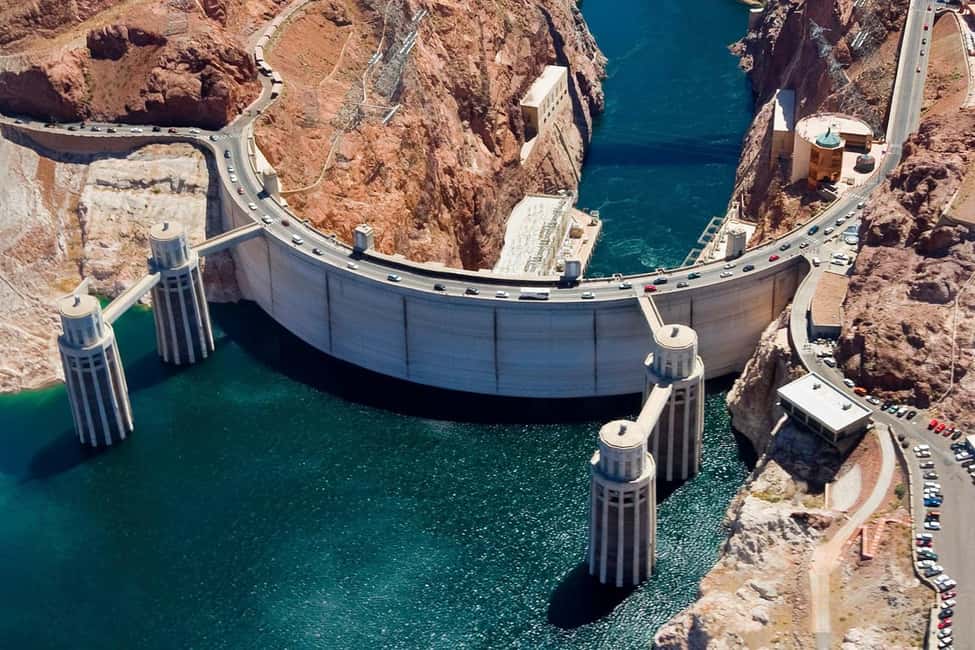
- Hoover Dam
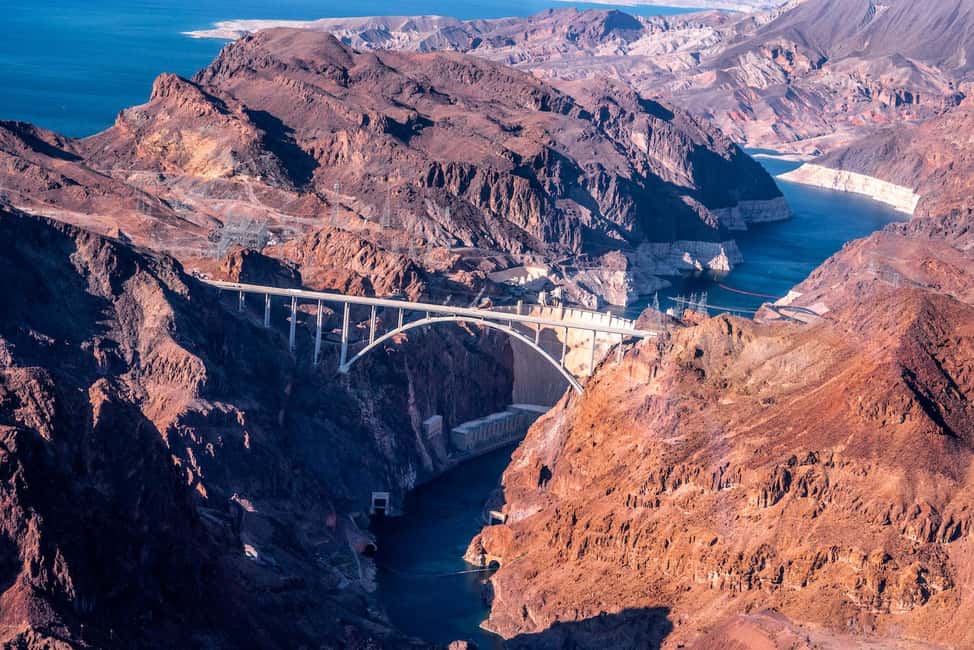
- the Bypass Bridge
- the Black Canyon
- the Colorado River
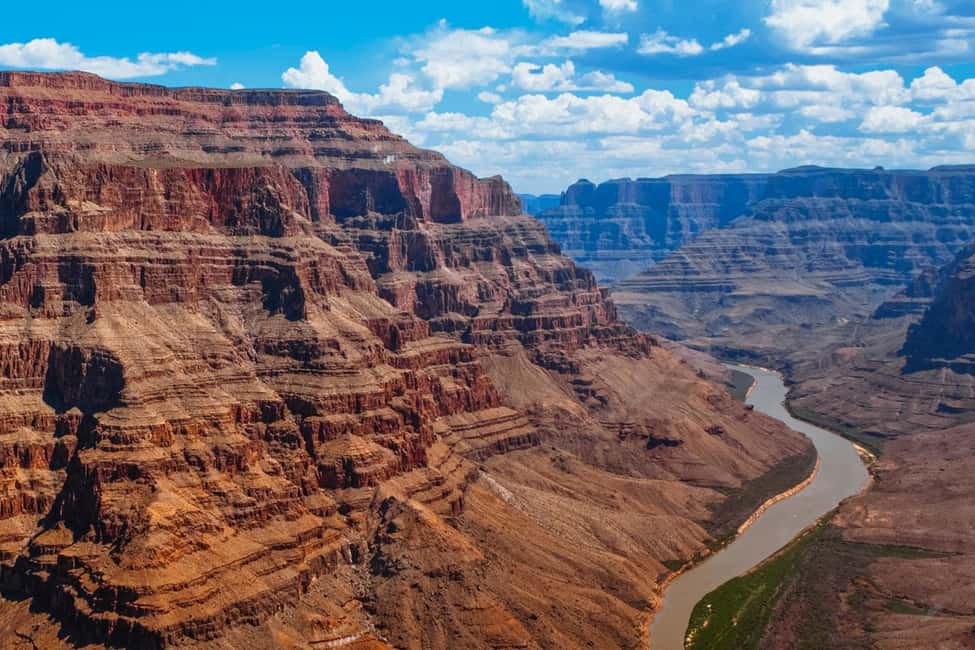
When you’re this high above the dam and bridge, you’ll understand scale fast. The river doesn’t look like a “feature,” it looks like the main actor carving its way through rock. And the dam—massive from street level—turns into a geometry lesson from the air: straight lines, engineered power, and the desert working in the background.
The pilot also provides commentary during the flight. That’s not just entertainment. It gives you names and context for what you’re seeing, so you don’t just get pretty views—you get better looking views.
Grand Canyon flight moment: Fortification Hill and the canyon from above
After leaving Hoover-area landmarks behind, the flight continues into the Grand Canyon region. One of the most interesting named stops on this route is Fortification Hill, described as an extinct and still-something volcano area. The pilot points it out as you ascend, which is a great way to make the geography feel “real” instead of random peaks and ridges.
You’ll also fly past geological formations that the route describes as showing millions of years of history—think cathedral-like buttresses and brightly colored rock pillars around turns. That’s one of the best things about an aerial viewpoint here: canyon bends that look subtle from the ground can turn dramatic from above, because you see the river’s path and the rock’s layering at the same time.
The flight also highlights the Colorado River from the air—so you get a clear match between what you saw above and what you later feel on the raft. It’s like watching the “before” and “after” versions of the same story.
Switching gears to the raft: 14-mile guided float starting at the dam
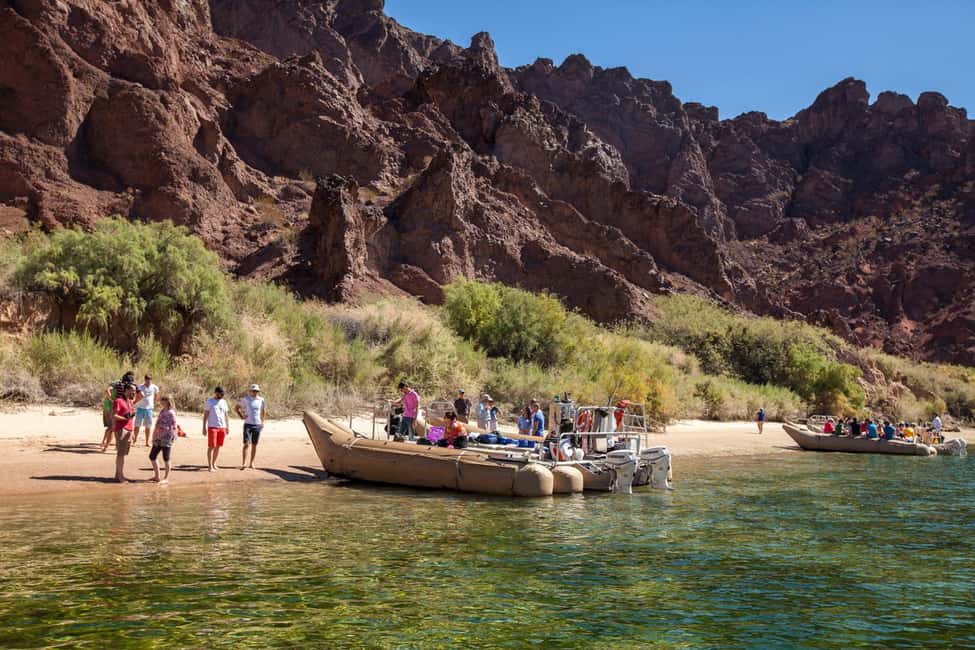
Once the helicopter wraps, you head to the Hoover Dam Lodge in Boulder City. From there, you go to the launch area at the base of Hoover Dam and the newly constructed Bypass Bridge. It’s a smart transition: you start on calm water right where the aerial focus began, so your day stays coherent.
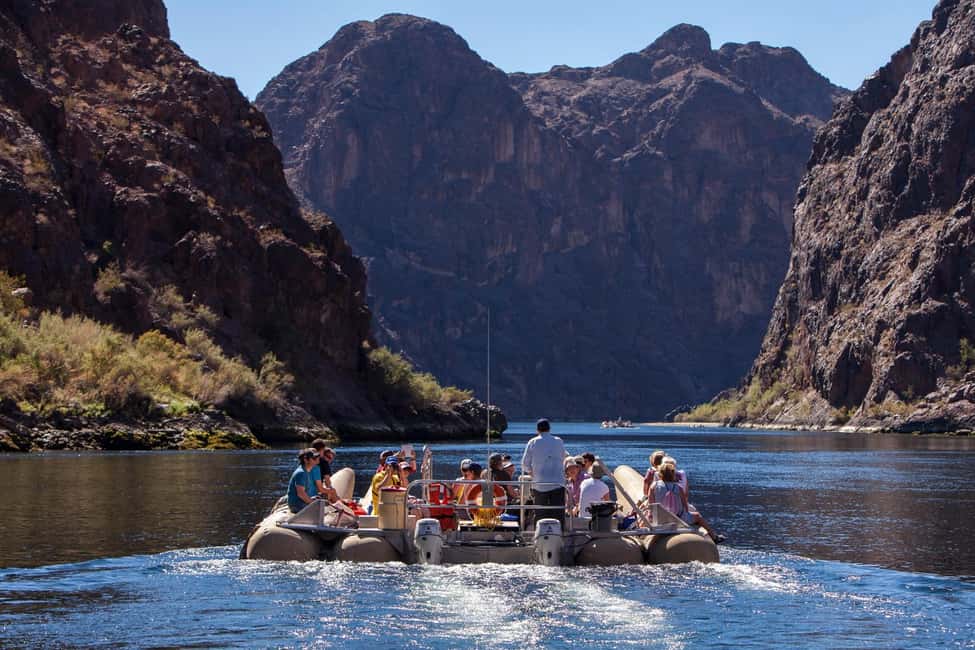
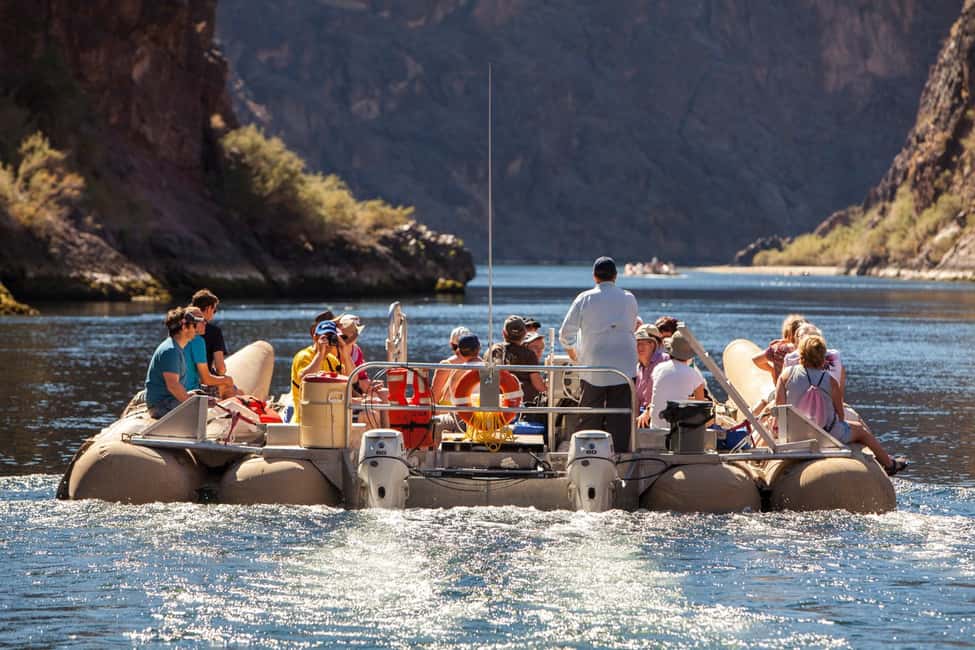
The rafting itself is a 14-mile guided smooth-water trip (about 4 hours). The tone here is relaxed, but not boring. The raft is spacious and comfortable, and your guide greets you before you get moving.
The Black Canyon walls are a big part of why this works. From the water, they seem to rise with almost zero effort. You’ll want your camera ready, especially at river bends when the canyon tightens.
Wildlife and swim stops: what you can do on the river
This trip is built for enjoying the river, not just passing it. The guide points out natural sights along the way, and the route notes possible wildlife sightings like:
- desert bighorn sheep
- osprey
- great blue herons
You’re not guaranteed animals, of course. But the fact that your guide is watching and explaining what’s around you is a real quality-of-experience factor. It turns “pretty canyon” into “something alive happening right now.”
You’ll also stop at secluded Colorado River beaches, where you can swim or paddle in refreshingly cool, clear water. If water time matters to you, pack accordingly:
- swimwear (listed as a bring)
- sunglasses and sunscreen
- a camera that won’t panic if it gets splashed (use common sense here)
The picnic lunch at Black Canyon: simple, practical, timed well
You’ll eat a picnic box lunch while you’re on the river, taking in the sounds and sights of the Black Canyon and surrounding desert. This is one of those details that sounds small until you’re hungry in a remote place.
Because lunch happens during the rafting window, you don’t have to guess where to grab food or burn time driving to it. The day stays smooth.
My advice: treat lunch as part of the pacing. Eat early-ish when the opportunity appears, then save your appetite for the big views later at Willow Beach.
Willow Beach finish: shopping at the Arizona side
When the raft trip ends, you’ll finish on the Arizona side of the river at Willow Beach. The tour includes time for souvenir shopping, which is practical if you want a quick “proof you were here” moment without hunting for anything complicated.
This stop also helps the day feel complete. From the Strip to the dam, then into canyon country, you finally get a small town-style wrap-up where you can take a breath, buy something fun, and not immediately jump back into transportation.
Price and value: is $699 worth it?
At $699 per person, this is not a budget day. But value here is mostly about what you’re getting: one helicopter flight plus a guided river raft, with narrated views and included food.
If you tried to piece this together yourself, two big expenses would stack fast:
- helicopter access to Hoover Dam / Black Canyon / Grand Canyon areas
- guided raft operations at the Hoover Dam launch region and a full 14-mile route
This package is built to reduce friction: transportation from Las Vegas hotels, the helicopter flight, the rafting portion, and the picnic lunch are tied together. You’re paying for speed and access—seeing places that are hard to reach in a single day without specialist operators.
Where the price may feel steep is if you’re mainly after one piece: if you’d rather save money and just do rafting, or if you’d rather save money and just do a Grand Canyon helicopter flight elsewhere. But if you want both—air views and river time—this is the kind of combo day that can make sense.
Who this tour suits best (and who should pass)
I think this tour is ideal for you if you:
- want helicopter views with forward-facing seating and wide sightlines
- like the idea of a calm river float where swimming is possible
- enjoy guides who narrate what you’re seeing from both air and water
- prefer a small group (up to 6 people), which usually means a less crowded feel
It’s not suitable for:
- people with back problems
- wheelchair users
- pets (not allowed)
- anyone expecting weapons or alcohol to be part of the day (not allowed)
Also note the size rule: if you’re over 250 lbs (112 kg), you’ll be required to purchase an additional seat.
Practical tips to make the day easier
This is a long day, so the small stuff matters.
Bring:
- sunglasses
- hat
- swimwear (for the raft stops)
- camera
- sunscreen
- water
- comfortable clothes
Not allowed:
- pets
- weapons or sharp objects
- smoking
- alcohol and drugs
One more thing: the tour operates Thursday thru Sunday, and the 7:00AM departure time is selected for the Hoover Dam River Rafting Adventure Tour. If you don’t love early starts, choose your dates carefully.
Should you book the Grand Canyon Helicopter Flight & Hoover Dam River Float Raft?
I’d book this if you want a single, focused day that hits the big-name landmarks fast: Hoover Dam and Bypass Bridge from above, the Black Canyon and Colorado River by raft, and the Grand Canyon from the sky. The combo is the point, and the pacing is built to keep both parts enjoyable.
I’d think twice if you need wheelchair access, have back issues, or you’re hoping for a short, low-commitment outing. Also, if early morning logistics will ruin your vacation vibe, pick another activity that fits your sleep schedule.
If you’re the type who loves seeing a place from multiple angles—roof-level views and water-level views—this is a strong fit for you.
FAQ
How long is the Grand Canyon Helicopter Flight & Hoover Dam River Float Raft?
The total duration is 10 hours.
What days does the tour operate?
It operates Thursday through Sunday.
What’s the departure time for the Hoover Dam River Rafting Adventure Tour?
The tour notes a select 7:00AM departure time for the Hoover Dam River Rafting Adventure Tour.
How long is the rafting portion and how far do you go?
You’ll enjoy a guided smooth water rafting trip described as 14 miles (about 4 hours).
Where does the rafting start and where does it end?
The rafting starts at the base of Hoover Dam and the Bypass Bridge, and it ends at Willow Beach on the Arizona side of the river.
What’s included for food during the trip?
You’ll have a picnic box lunch on the river. Complimentary water is also provided at the air terminal.
Is swimming or paddling allowed during the raft trip?
Yes. There are stops at secluded Colorado River beaches where you can swim or paddle.
What type of helicopter seating and views should I expect?
The helicopter experience includes forward-facing seats and 180-degree panoramic views.
Is there any weight limit for passengers?
Yes. Passengers exceeding 250 lbs (112 kg) will be required to purchase an additional seat.
]]>I love how the pickup and van-style comfort help everyone, including older family members, get a front-row view without long distances on foot. I also like the English-guided storytelling, which turns the flashy stops into something you can actually understand in minutes.
A key drawback to consider: it’s about 2 hours, so you won’t have time to wander deeply into casinos or linger for long at each photo spot. Think of it as an efficient overview that gets you oriented fast.
Key Highlights You’ll Feel Right Away
- Door-to-door pickup help so you spend less time figuring out logistics and more time looking out the window
- Free, iconic photo stops with the Strip, Bellagio Fountains, the Sphere area, and the Welcome sign
- Bellagio Fountains numbers that make your jaw drop (up to 460 feet, 1,214 water nozzles, 4,792 lights)
- Custom-fit pacing that works well when your group has different energy levels
- Clean, easy-to-board vehicle experience that matters when mobility is a concern
A Quick, Comfortable Route Down The Las Vegas Strip
Las Vegas is loud, bright, and designed to be seen from multiple angles. What I like about this kind of short-format tour is that you get the story of the Strip without needing to plan every turn yourself.
The route centers on the Las Vegas Strip, with its stretch of upscale casino hotels, neon signage, and performance venues. You’ll also get a sense of how the huge hotel complexes function like mini-cities, with shops, restaurants, and entertainment all inside the same walls. Even if you’re not gambling, the Strip is still the main stage: where people come to see lights, architecture, and big-name shows.
This is where the comfort part really matters. Reviews from families highlight that pickup and patient guidance make it easier to enjoy the sights without turning the trip into a walking test. If you have someone with limited mobility—or you just don’t want to burn your whole day navigating crowds—that’s a big win.
One more practical note: the tour duration is listed as about 2 hours, and that’s a realistic frame for a driving/stop format. You’ll get the overview, not a slow meander. If your plan is casino-hopping for hours, you might treat this as your first stop (so you can decide what to revisit later).
Bellagio Fountains: The Free Show With Big-Scale Details
Bellagio Fountains is one of the rare Vegas attractions that’s both famous and actually accessible without adding cost. The show runs in front of the Bellagio on a man-made lake, and it uses a big technical setup: 1,214 water nozzles, 4,792 lights, and jets that can shoot up to 460 feet.
Even if you’ve seen photos before, the scale tends to hit differently when you’re there. The good part is that it’s built for quick enjoyment—about 15 minutes on the schedule—so you get the payoff without eating your whole tour time.
What I’d do as a practical move: bring your camera and decide ahead of time what you’re aiming for. If you want classic fountain symmetry shots, you’ll want to position yourself quickly when you arrive. If you just want to absorb the effect and get a few usable photos, this timing works well.
Possible downside: since it’s short, don’t plan on perfect composition for every shot. The goal here is seeing the show and moving on, not lingering for an extended, photographer-only session.
Sphere Stop: A Modern Vegas Landmark East of the Strip
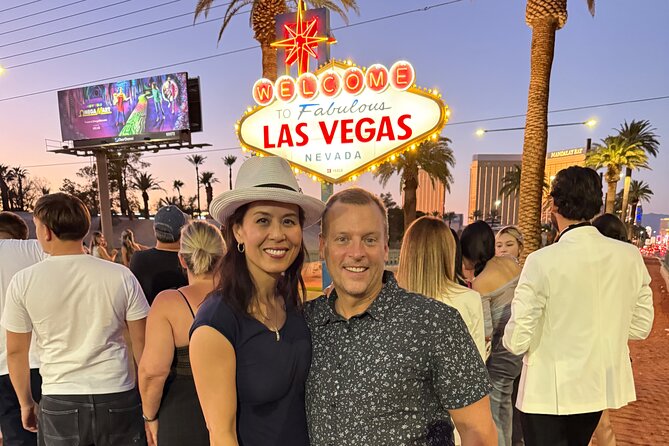
Next up is a stop at the Sphere, a music and entertainment arena in Paradise, Nevada, located just east of the Las Vegas Strip. The project was designed by Populous and was announced by the Madison Square Garden Company in 2018, when it was known then as the MSG Sphere.
Even if you don’t know the technical background, the Sphere is visually unforgettable. It’s one of those places where seeing it from the right angle helps your brain connect the dots. A driving tour format works well here because you can catch the structure without needing to build a separate outing.
Since the schedule doesn’t give a specific duration for this stop in the details provided, plan for it to be more of a “see it, understand it, get your bearings” moment than a long stay. If your main goal is photos, I’d treat this as your quick checkpoint before you wrap up at the Welcome sign.
Welcome To Fabulous Las Vegas Sign: What Makes It More Than a Photo
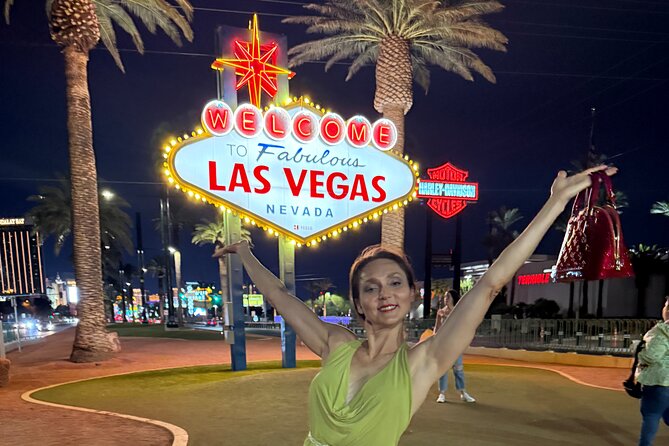
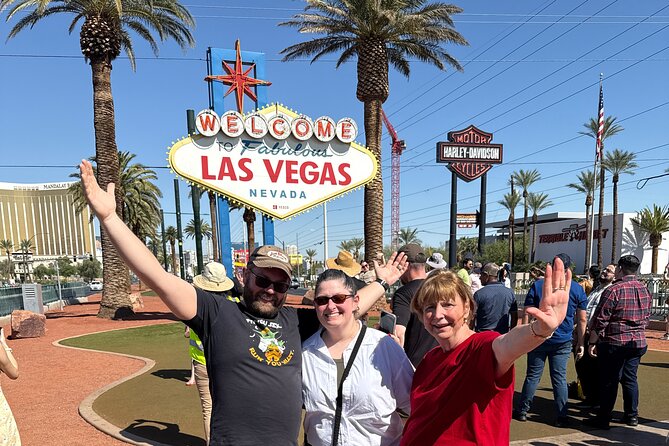
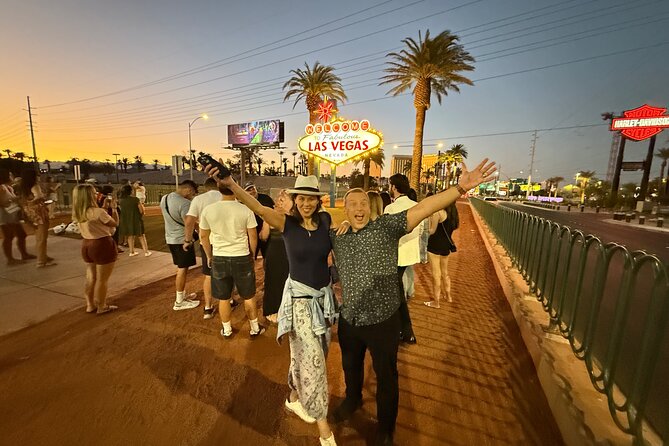
The Welcome to Fabulous Las Vegas sign is more than a cheesy postcard backdrop—there’s actual local origin behind it. The sign was funded in May 1959 and erected soon after by Western Neon.
The design is credited to Betty Willis, created at the request of local salesman Ted Rogich, who then sold it to Clark County, Nevada. That kind of detail turns a familiar sight into something you can tell your group about while you’re standing there.
You’ll have about 15 minutes for this stop. That timing is usually plenty for the main photo and a quick look around. If you want crowd-free shots, earlier arrival time can help, but the tour format here is set up as a short visit so you won’t be waiting around for hours.
I also like that the tour approaches it as a landmark with a story, not just a checklist box. On a first Vegas trip—or a first taste of the Strip—this is exactly the sort of stop that helps you understand why the city looks the way it does.
Price and Value: Is $219 Per Person Worth It?
At $219 per person for an experience listed at about 2 hours, the real question is what you’re buying. You’re not paying for paid attractions here—the major attractions on the route have free admission as stated for the Strip stop and Bellagio Fountains. You’re paying for the organization, the vehicle, and the guided experience.
Here’s where the value gets practical:
- Pickup offered means you’re not spending your trip time figuring out transport between major points.
- Snacks and bottled water help keep the day from feeling like work.
- An English guide is included, which matters because the stops become more than scenery when someone connects dots quickly.
- It’s a private tour/activity, meaning only your group participates, which helps if you want less chaos and a more tailored pace.
- Group discounts are offered, though exact details aren’t listed—still, it’s a plus if you’re traveling with more than one person.
When I think about who this fits best, I usually land on two groups: families who need an easier, less exhausting sightseeing setup, and first-timers who want a fast orientation of the Strip highlights before choosing what to do next.
If you’re a solo traveler who loves long walks and spontaneous detours, this might feel short. But if you want the big hits delivered efficiently, the pricing starts to make sense fast.
Logistics That Matter: Pickup, Mobile Ticket, and Real Pacing
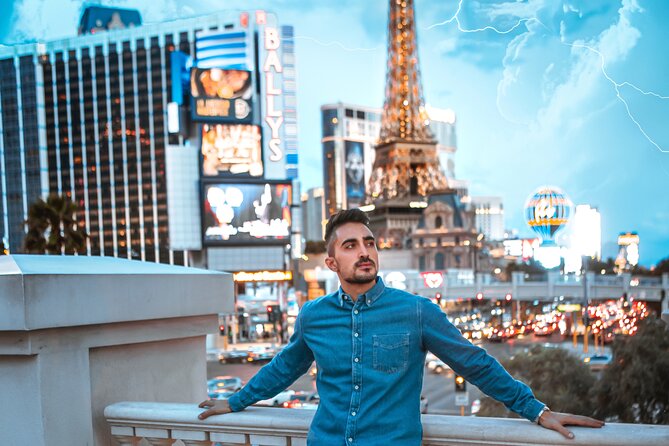
This tour is built to reduce friction. The guide contacts you prior to and at arrival, and pickup is offered, which is a huge deal in Vegas where distance and parking can eat time. The tour also uses a mobile ticket, so you should expect a paper-free setup.
The experience details also say it’s near public transportation, which can be helpful if you’re staying in an area with easy transit options or if you’re coordinating with others who might be coming from a nearby stop.
One more thing I appreciate: the experience is designed so most travelers can participate, and service animals are allowed. That matters for planning comfort.
From a pacing perspective, the route includes quick stops at multiple highlights. That’s why it works well for families and mixed-age groups. In one review, an older dad could see the Strip, the Downtown area, and the Welcome sign without long walking. In another, a short-notice booking was turned into a customized route, with the guide and driver providing lots of info while staying flexible. These are the kinds of real-world benefits you feel when your trip has limited time.
Who This Tour Is Best For
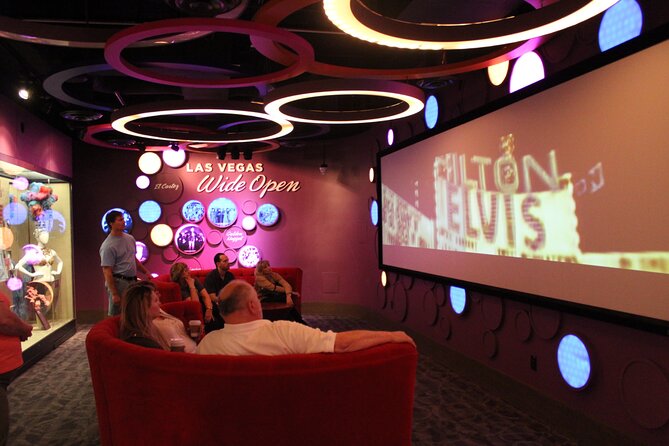
This isn’t the best choice if your idea of a great Vegas day is long casino wandering and browsing. It’s better when you want a guided highlight route that gets you oriented and keeps your energy intact.
You’ll likely love it if:
- You’re visiting for the first time and want the main sights without planning every detail
- You’re traveling with family and need comfortable viewing over strenuous walking
- You want an English-speaking guide to provide context during the stops
- You’d rather do a short, well-organized tour and then explore on your own later
It’s also a good “reset” activity if you’re arriving and want a quick feel for what’s where.
Should You Book This Famous Las Vegas Tour?
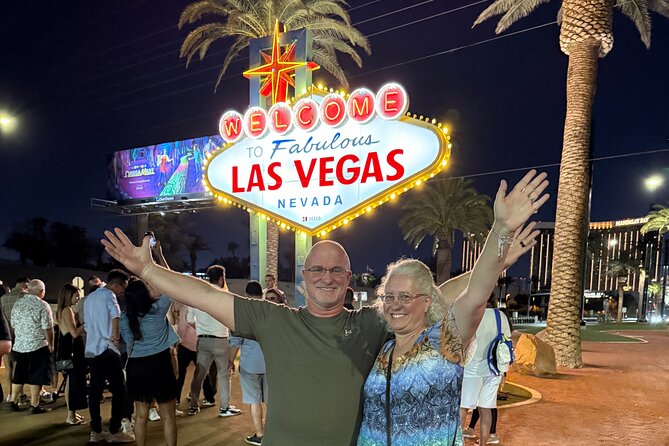
If your priorities are efficiency, comfort, and iconic sights, I’d book it. It’s priced like a guided, organized experience, and you get real value from the included support: pickup help, snacks and water, and an English guide across major landmarks.
Skip it only if you know you want extended time at each stop or you want a more hands-on, street-level Vegas deep dive. This is an overview tour, and that’s exactly why it works for many visitors.
If you book, I’d treat it as your first pass through the Strip. After that, you’ll be in a better position to choose what to revisit—because you’ll know what you actually cared about.
FAQ
How long is the Famous Las Vegas Tour?
It’s listed at about 2 hours.
What is the price per person?
The price is $219.00 per person.
Are pickups available?
Yes, pickup is offered. The guide will contact you prior to and at arrival.
What language is the tour in?
The tour includes an English guide.
Are any admissions included for the main stops?
Admission is listed as free for the Las Vegas Strip stop and Bellagio Fountains.
Is this tour private?
Yes. It’s a private tour/activity, so only your group participates.
What is included with the tour?
It includes snacks, bottled water, and an English guide.
What is the cancellation policy window?
You can cancel for a full refund up to 24 hours in advance. If you cancel less than 24 hours before the experience starts, the amount paid isn’t refunded.
]]>I love the iconic Bellagio backdrop because it makes even a simple session feel like a real Vegas memory. I also like that the photographer actually runs the show, with pose coaching and in-camera checking so you can adjust on the spot. People I spoke with during past shoots also praised the calm, at-ease vibe and the way photographers like Jacie and Victoria help you feel comfortable quickly.
One thing to consider: this experience requires good weather, and it’s focused around the Bellagio Fountains area rather than a whole tour of Vegas. If you want a wide mix of neighborhoods, this may feel a bit too concentrated.
Key highlights worth knowing before you go
- Bellagio Fountains as your main backdrop: You start at the Bellagio fountains, one of the most recognizable photo settings in Las Vegas.
- 30-minute or 1-hour private session: Short and efficient, or longer if you want more angles and variety.
- 45 fully-edited photos within 5 business days: The editing workload is handled for you, so you’re not sorting through hundreds of raw shots.
- You can share location preferences: If you have photo ideas beyond the fountains, you can request them and the photographer can plan around that.
- Private experience for your group only: This isn’t a camera-crew free-for-all with strangers drifting into your frames.
- Good-weather requirement: Plan for flexibility, since poor weather can mean a different date or a refund.
Why a Bellagio Fountains shoot is such an easy Vegas win
Las Vegas can be loud, fast, and chaotic. A private photo session gives you one clear goal and one great setting, without turning your trip into an all-day logistics puzzle. Starting right at the Bellagio fountains means your photos have instant place recognition, even if you only have a small window of time.
The best part is how you control the length. A 30-minute session is ideal if you want a clean, focused set of portraits. The 1-hour option is for people who like more freedom: more time to settle in, experiment with poses, and capture different looks without rushing.
And while Vegas photos can sometimes come out stiff, this setup is built for direction. The photographers are hands-on, and the experience includes a chance to review what’s being captured so you can feel confident it’s going the right way.
Meeting at Bellagio: where you start and what that means for photos
Your session starts at Bellagio Hotel & Casino, 3600 S Las Vegas Blvd, Las Vegas, NV 89109. You’ll end back at the meeting point, so you’re not dealing with transit or wondering where to regroup. That matters in Vegas, where a few wrong turns can turn a smooth plan into a late arrival.
Starting at Bellagio also helps with photo consistency. One landmark setting means your photographer can work out spacing, angles, and composition without constantly relocating. If you’ve got a busy itinerary day—dinner reservations, a show, or a shopping stop—this “start here, finish here” structure is a big quality-of-life win.
Also, the meeting point is easy to recognize once you’re on the property. If you’re navigating solo, you can plan to arrive a few minutes early and get oriented before the shoot begins.
The Bellagio fountains setup: iconic backdrop, practical focus
The session’s main stop is the Fountains of Bellagio. That’s the star of the show visually, and it’s why the photos tend to feel extra “Vegas” even years later.
A practical bonus: photographers can use the setting to guide you into flattering angles quickly. With a destination this recognizable, there’s no need to spend the first 10 minutes asking where to go or what to look for. Instead, you can spend that time getting comfortable in front of the camera.
One detail that helps: you can share preferences for locations so the photographer can visit those spots for your photoshoot. If you’re dreaming of a particular corner, vibe, or angle, it’s worth telling them. It gives the shoot a personal touch instead of feeling like a one-size-fits-all portrait session.
Choosing 30 minutes vs 1 hour (and which one fits your style)

This experience gives you two options: 30 minutes or 1 hour, and it’s a private setup for just your group.
Here’s how I’d choose:
- Pick 30 minutes if you want a quick hit: a strong set of portraits with minimal stress, and you’re okay with fewer variations. It’s also listed with admission ticket free on the 30-minute option, which is a nice added value for that shorter session.
- Pick 1 hour if you want more chances to get the photos you’ll actually want to print. More time typically means more outfit/pose variety and more time for adjustments if you’re not totally sure what looks good on camera yet.
If you’re celebrating something specific—engagement, quick wedding photos, or a “we finally got good photos” vacation goal—1 hour often feels less rushed. If you just need a standout Vegas portrait set, 30 minutes is usually enough to get great results without eating your day.
How the photographer keeps you comfortable and gets better photos fast
The difference between average vacation photos and great ones is simple: someone who knows where to place you and how to fix small things in real time.
From prior experiences with photographers including Jacie, Victoria, and Viktoriya, the consistent theme is how relaxed the sessions feel. The photographer contacts you before the shoot so you can share what you want, including where to meet and what you’re interested in photographing. That prep matters because it cuts down on awkward, last-minute decision-making.
Even better: you can view photos in the camera to make sure you’re happy. That means you’re not waiting for delivery wondering what went wrong. It also gives you a chance to say things like: I want that angle, I want more smiling, or can we try again with this stance.
And if you’re not “photogenic” in your own head, you’re not alone. One of the clearest benefits here is that the photographer will guide your angles and poses. You don’t have to guess your way through it, which is a relief for a lot of couples and families.
What you actually get: 45 fully edited photos (and why that’s a real value)
The deliverable is straightforward: 45 fully-edited photos delivered within 5 business days. That’s a strong perk because it saves you from the common post-trip problem of sorting and editing a big pile of raw images.
It also sets expectations. Some photo services give you “lots of photos” without telling you how many will be edited, or how long editing will take. Here, you know the number and the timeline up front, which makes your planning easier.
For you, that means:
- you can share your best shots quickly with friends and family
- you don’t have to invest time into editing after your trip
- you’re more likely to end up with photos you genuinely like, since you’re getting them fully processed
One more thing: because it’s private and focused, you’re generally capturing a coherent set of portraits rather than dozens of random snapshots. That helps the final selection feel intentional.
Timing, flexibility, and real-world Vegas challenges
The shoot timing is flexible enough to fit into your schedule. That matters because Vegas days rarely run on a clean timeline. You might be juggling meals, lines, heat, or a late-night event.
You also have a weather dependency. The experience requires good weather, and if it’s canceled due to poor weather, you’ll be offered a different date or a full refund. That’s not a gimmick—it’s a practical factor because the fountains and lighting conditions can be affected by conditions outside anyone’s control.
One underrated advantage from a past shoot: the photographer can handle high-traffic schedule chaos. In one experience, Jacie planned around major road closures during the F1 race period so the group didn’t waste time getting from point A to point B. In plain terms: if your dates overlap with big events, having someone who can think ahead helps a lot.
Price and value: what $142.97 per person is really paying for

The price is $142.97 per person, and it covers a private photoshoot plus the editing workload. When you break it down, you’re not just paying for “someone to take photos.” You’re paying for:
- the photographer time (30 or 60 minutes)
- the setup to guide poses and composition
- and the delivery of 45 fully edited images within a set timeframe
That turns the purchase into something easier to judge. You know what you’re getting and when you’ll get it. For couples and families who want a standout set of images without spending extra time selecting, editing, or paying again for upgrades, the value can feel pretty solid.
It can also be great for people who hate the idea of standing around waiting for a photo. A private session is a “show up, shoot, get directed, leave” model. Vegas is expensive; your time is expensive too. This cuts down wasted hours.
Who this photoshoot is best for
This experience is a strong fit if you want:
- Engagement or wedding-day photos without the stress of being “on” all day
- A high-quality portrait set with a recognizable Vegas backdrop
- A private, directed session if you’re worried about posing
- Fast editing delivery so you can enjoy photos soon after your trip
It’s also a good option if your schedule is tight. The session is short, and the meeting point is fixed at Bellagio—no complicated moving parts.
If you’re the type who wants a road-trip style photo tour across multiple distant locations, you might feel boxed in by the Bellagio focus. In that case, consider whether you want “one iconic backdrop done well” or a full Vegas photo marathon.
Should you book the Private Vacation Photoshoot in Las Vegas?
I’d book it if you want dependable, good-looking photos with direction and a clear turnaround time. The Bellagio Fountains setting does a lot of the work for you visually, and the private format means you won’t be juggling other people stepping into your shots.
Book it especially if:
- you care about getting photos you’ll actually want to keep
- you want a stress-free plan with minimal logistics
- you’d rather pay for editing once than wrestle with a pile of raw images later
I wouldn’t book it if:
- you’re planning around uncertain weather and you can’t adjust plans
- you want a broad sweep of Vegas neighborhoods in one session
If your goal is simple—get great portraits in one of the most iconic places in Las Vegas, with a photographer who keeps things easy—this is an easy yes.
FAQ
How long is the private photoshoot?
You can choose a 30-minute or 1-hour private photoshoot.
Where does the photoshoot start?
The session starts at Bellagio Hotel & Casino, 3600 S Las Vegas Blvd, Las Vegas, NV 89109, USA.
Is it only my group, or are there other people?
This is a private activity. Only your group will participate.
What location is used for photos?
The photoshoot starts at the Fountains of Bellagio.
How many photos will I receive, and how soon?
You’ll receive 45 fully-edited photos within 5 business days.
What language is the experience offered in?
The experience is offered in English.
Are mobile tickets included?
Yes, it includes a mobile ticket.
What happens if the weather is bad?
The experience requires good weather. If it’s canceled due to poor weather, you’ll be offered a different date or a full refund.
]]>You get a Spanish-speaking guide with audiovisual support in the van, plus a structured route that keeps moving without feeling like a blur.
What I like most is the focus on Grand Canyon West itself, not just a fast drive-by. I also really like the extra viewpoint time at Guano Point, where the tour gives you time to soak in one of the best angles of the whole rim area.
One thing to consider: the van ride can feel tight. If you end up in the back seats, it can be harder to see along the drive, so I’d aim for a spot toward the front if you have any choice.
Key highlights at a glance
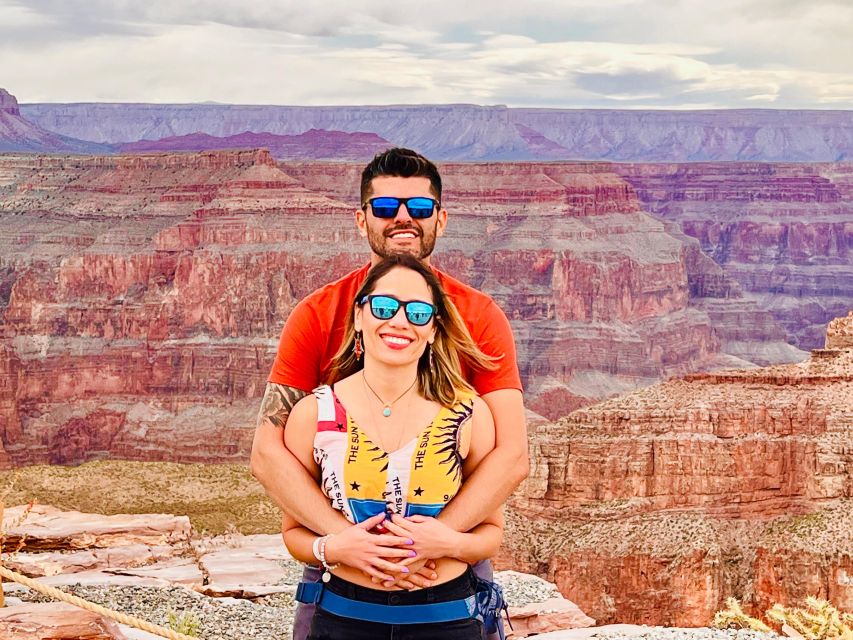
- Hoover Dam + Grand Canyon West in one day so you don’t have to pick just one
- Spanish live guide with audiovisual support during the ride
- SkyView Restaurant time at Grand Canyon West for an easy meal stop
- Guano Point free-time style viewing with a short walk that’s worth it
- Optional Skywalk (not included) if you want the glass deck experience
- Wi-Fi in the van + bottled water to make the long day easier
A one-day Grand Canyon plan that actually fits Las Vegas time
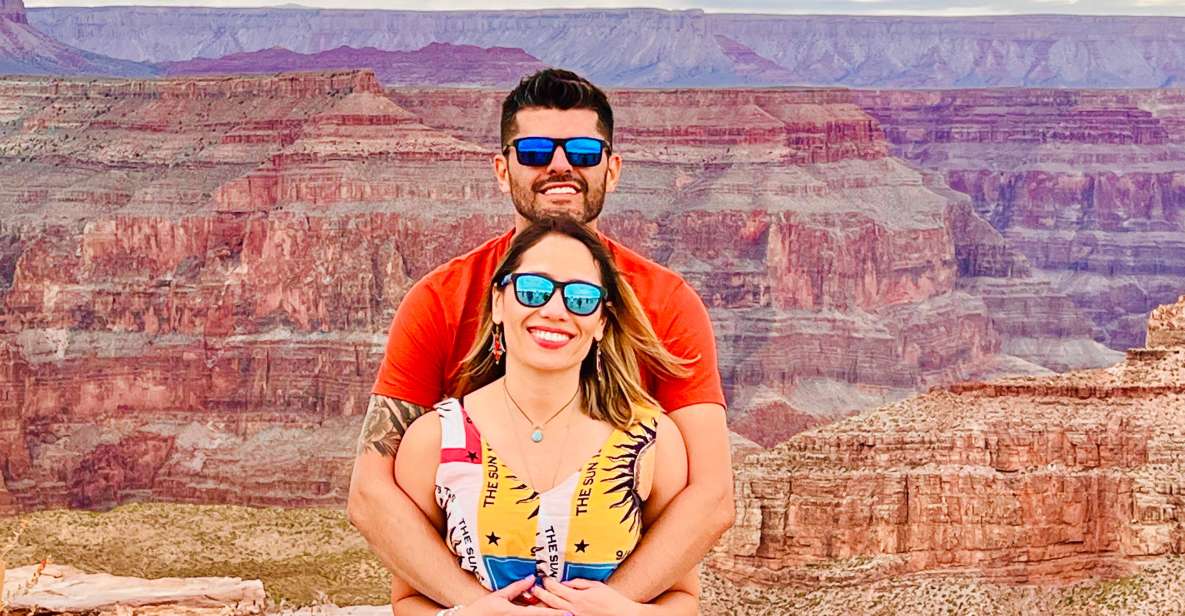
Most people come to Las Vegas for quick thrills and even quicker schedules. This tour matches that reality: you start with pickup in both the Strip and downtown Las Vegas, then you move straight into the two biggest “must-see” stops—Hoover Dam and Grand Canyon West—without forcing you into a multi-day logistics puzzle.
You’ll spend most of the day on the road and at the rim, but the route is built around sensible checkpoints. Short photo stops at major viewpoints keep the day from dragging, while the longer blocks of time at the canyon give you a chance to slow down. That balance is a real value when you’re spending just one day outside the city.
From Las Vegas pickup to Hoover Dam photo stop
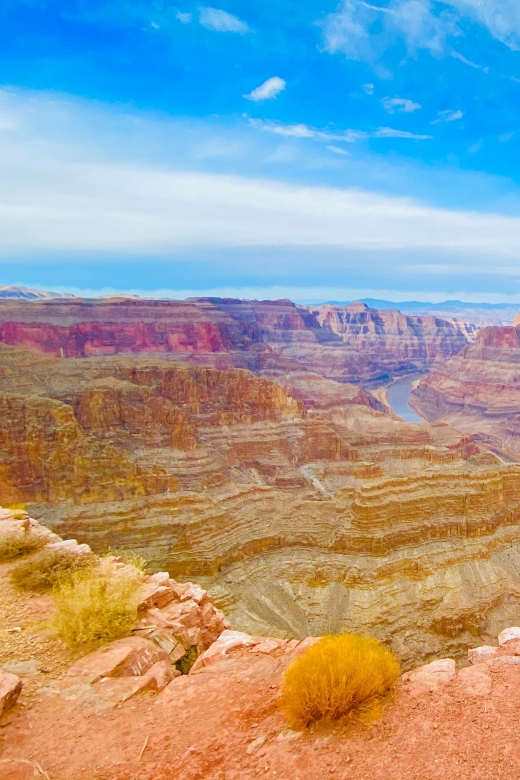
Pickup starts from your hotel area on the Strip and downtown. Then you’re on a van ride that lasts about 45 minutes before the first big moment: Hoover Dam.
Hoover Dam here is a photo stop, around 15 minutes. That might sound short, but it’s the right length for most people: you get enough time to grab pictures and stretch your legs, and you don’t lose half the day waiting for everyone to catch up. If you’re the type who likes getting the best angle fast, this format works well.
Two practical tips for this part of the day:
- If you care about photos, get your camera/phone ready before you arrive. The stop is brief.
- Be ready for the van ride right after. You’ll still have a long canyon segment ahead.
Lake Mead stop and the quick Arizona reset
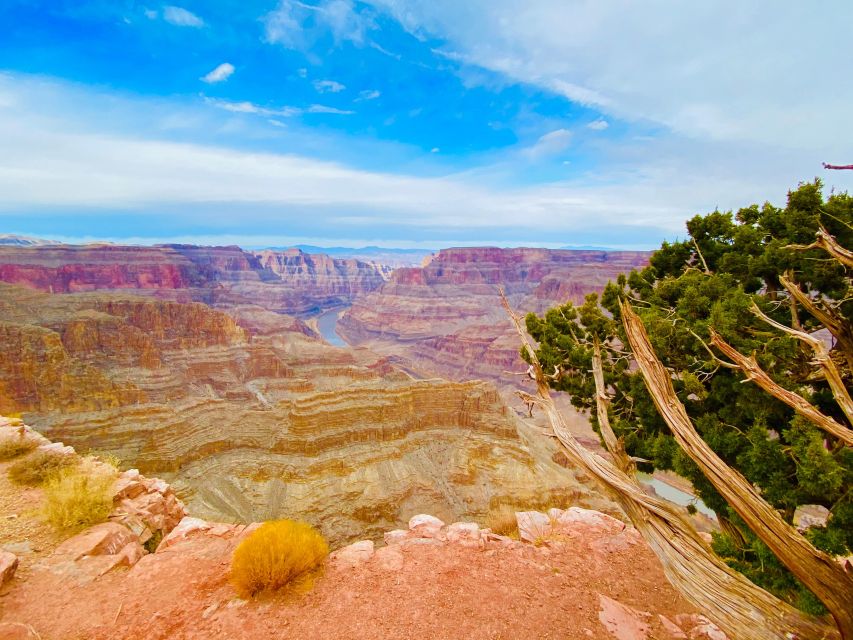
After Hoover Dam, you’ll have another short stop at Lake Mead National Recreation Area, roughly 5 minutes for photos. This is more of a palate cleanser than a destination, and it works as a buffer before the longer push toward the canyon.
There’s also a short break in Arizona for about 15 minutes. This is the moment to handle bathroom needs and get comfortable for the next stretch. Since your canyon time is the main event later, these small “reset” stops matter more than they sound on paper.
Grand Canyon West Rim: where most of your time should go
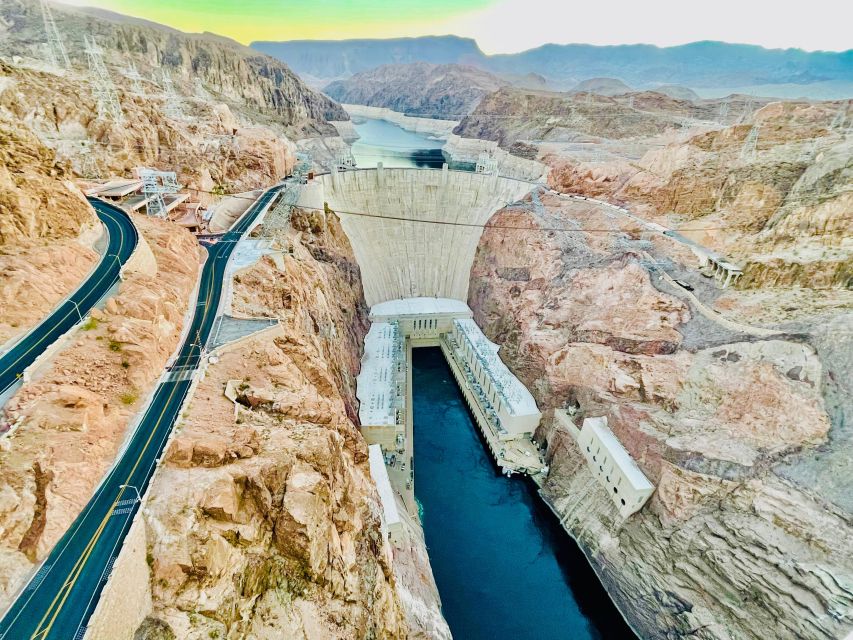
Now for the heart of the day: Grand Canyon West Rim, inside the Hualapai Indian Park area. Your drive to the rim segment is longer (about 80 minutes), so the goal here is simple: arrive, orient, and then spend time where you’ll feel the canyon the most.
First impressions and a guided orientation
You’ll have a photo stop, then a visit with guided tour time. The tour also sets you up for what I think is the smartest way to do Grand Canyon West: get the basic layout and viewpoint logic first, then let yourself roam during the self-guided block.
Lunch break at SkyView Restaurant
At Grand Canyon West you’ll also have time at SkyView Restaurant. This is your built-in meal stop, during which you can choose food from the menu while you’re surrounded by canyon views. Even if you’re not a “foodie,” eating here is helpful because it keeps your canyon time consolidated instead of turning lunch into a separate transportation problem.
Self-guided time plus shopping
You get around 1.5 hours of self-guided time at the rim. That’s the portion that helps you match your own pace. Some people will want the big viewpoints fast. Others will want to move slowly and take lots of photos from different angles.
There’s also time that includes shopping and even a shooting range option (listed as part of the on-site activities). If those aren’t your priorities, it’s still fine—you can focus on the viewpoints and walkways, and let the rest be optional.
The optional Skywalk decision
This tour includes park access and includes details tied to the famous glass deck experience, but Skywalk itself is not included. The information you receive will be enough to know your options, and your guide can help you with the Skywalk entrance separately if you decide you want to walk out on the glass observation deck.
If you’re debating whether it’s worth it, here’s the practical way to think about it:
- If glass-deck views are your “once-in-a-lifetime” thing, add it.
- If you’d rather spend your budget and time on more viewpoints at the rim, skip it and focus on the walking viewpoints you already have.
Eagle Point and Guano Point: the views that justify the long day
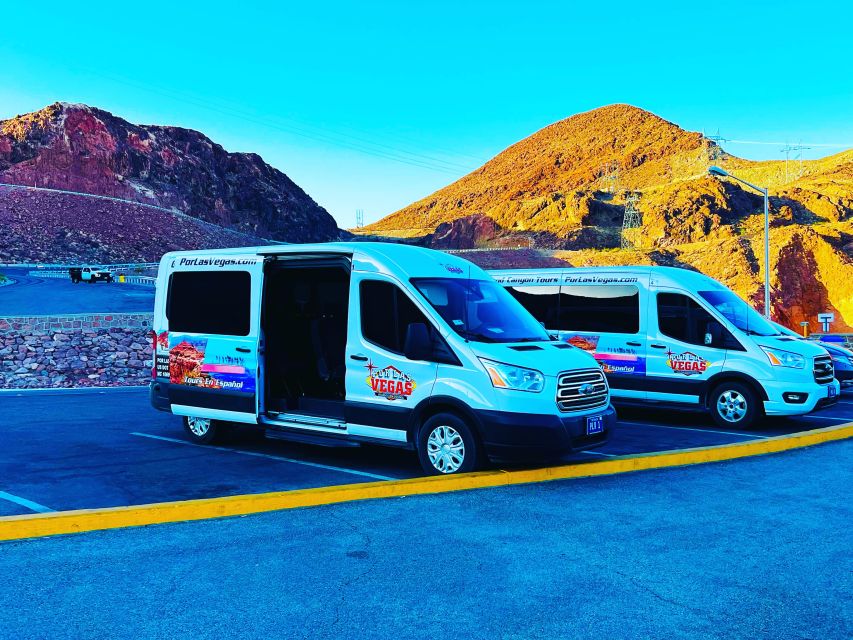
At Grand Canyon West, you’ll be guided through viewpoints, including Eagle Point and then later Guano Point. The rim at Grand Canyon West isn’t just one view—it’s a set of angles. That’s why the tour focuses on more than a single stop.
Guano Point free-time style viewing and why it matters
The tour includes a strong push toward Guano Point. You’ll do a photo stop there, plus a guided tour, and then a walk of about 45 minutes.
This viewpoint gets highlighted because the angle is dramatic—close to a 60-degree view of the canyon. In plain terms: you’re not just looking at the canyon from above. You’re getting an intense sense of depth and scale. That’s the kind of view you remember later, not the kind you scroll past the next day.
Also, having guided context before you walk helps. You know what you’re looking at, and you’re less likely to spend your time guessing which direction is best.
My advice for the Guano Point walk
Since you’ll have about 45 minutes of walking time, don’t plan to do anything rushed here. This isn’t just “a viewpoint stop.” It’s part of the experience. If you want photos, take them while you’re there instead of saving everything for the end.
And if you’re sensitive to walking distances, pay attention to your pace during the walk segment. You’ll feel it more than at Hoover Dam, because this is built around rim edges and paths.
Van ride reality: Wi-Fi included, but seat comfort matters
This tour includes Wi-Fi in the van and bottled water. Those two details are surprisingly useful on a 10-hour day. Wi-Fi helps you kill time between stops, and water saves you from having to find it later.
On the downside, the van seating can be uncomfortable if you end up toward the back. One downside I’d take seriously is visibility. If you’re seated in the last row, you may find it hard to see out during stretches of the drive, which is a shame because the scenery changes as you head toward the canyon.
So here’s what I’d do if you’re planning to book:
- When pickup happens, ask where you’ll sit.
- If the staff can seat you better, prioritize a spot where you can see the road ahead.
- Bring a mindset for the day: the real “show” starts when you arrive at the canyon, not while you’re stuck in transit.
Price and value: what $215 covers (and what it doesn’t)
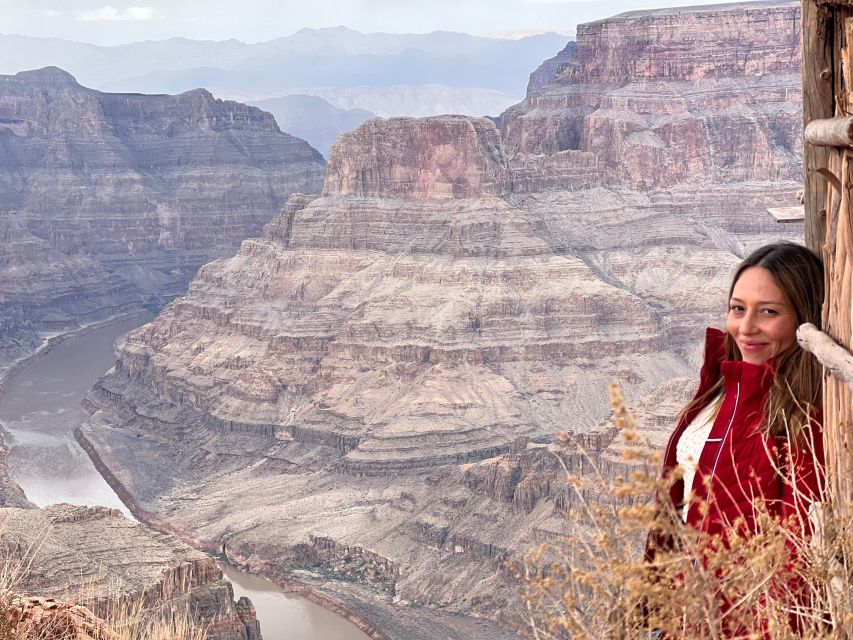
At $215 per person for a 10-hour guided Spanish tour, the value mostly comes from what’s packaged together.
You get:
- Transportation in a tourist van with Wi-Fi
- A Spanish guide with audiovisual support in the van
- A Hoover Dam photo stop plus entrance tickets into the Hualapai Indian Park for Grand Canyon West
- Viewpoints at Eagle Point and Guano Point
- Bottled water
- Priority-style tour structure that strings the sights together efficiently
What you don’t get:
- Tips
- Skywalk entrance (you can add it separately)
The smart way to judge the price is to compare it to the cost of doing Hoover Dam + a separate Grand Canyon West visit on your own. The day structure and tickets reduce friction. You’re paying for a full-day plan that avoids rental car math, parking hassles, and coordinating timing across multiple key stops.
If your must-do is Skywalk, your total budget will rise, because the glass deck is separate. If you’re fine skipping it, the base price is more likely to feel like a clean deal.
Who this Spanish Grand Canyon West tour suits best
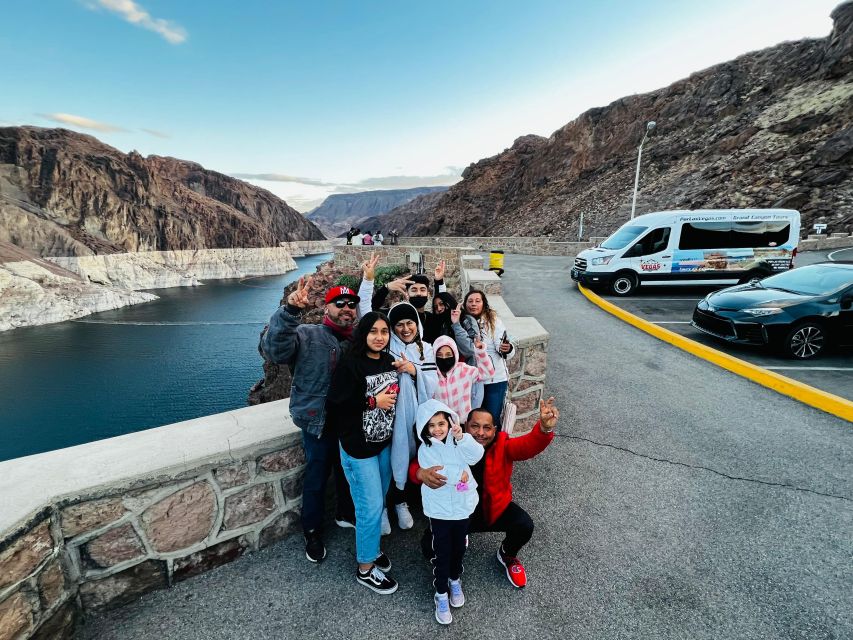
This is a strong fit if you:
- Want a Spanish-speaking guide and audio support
- Only have one day and want both Hoover Dam and Grand Canyon West
- Like structured stops plus room for self-guided time
- Care about getting to the Guano Point area, not just a quick rim photo
It may not be the best fit if you:
- Need wheelchair accessibility (the tour is not suitable for wheelchair users)
- Hate long van days with limited comfort, especially if you’re prone to motion discomfort
- Have heavy luggage needs (large bags aren’t allowed)
Also note the tour has clear vehicle rules: no pets, no drones, and no alcohol in the vehicle. If you travel with any of those, you’ll need alternative arrangements.
Booking checklist: what you’ll want to bring and expect
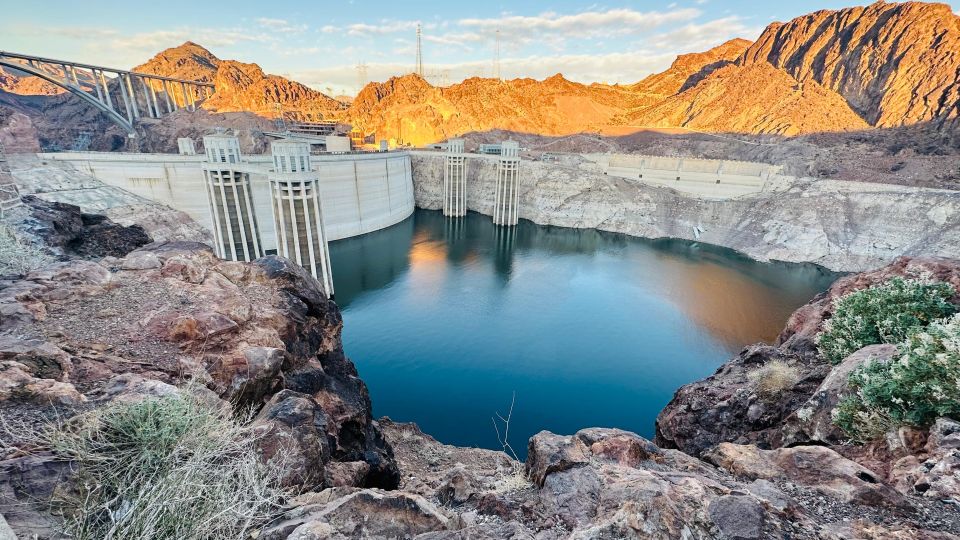
You’ll want to bring a passport or ID card. That’s the only specific document requirement listed, and it’s easy to forget if you’ve been traveling without thinking about park entry rules.
For what happens before pickup, the pickup details are sent via WhatsApp the day before. If you don’t receive that message, you’re instructed to call the contact number to confirm your pickup information. This is one of those small things that keeps day-of confusion from happening.
Language is Spanish throughout, and the guide also provides audiovisual content in the van. That helps a lot if you prefer guided storytelling over reading your own info later.
Should you book this Gran Cañón en español excursion from Las Vegas?
I’d book it if you want an organized one-day Grand Canyon experience with Hoover Dam included, Spanish guidance, and real time at Grand Canyon West—especially Guano Point. The route makes sense for a short trip, and the optional Skywalk choice gives you flexibility based on your budget and how brave you feel about glass decks.
I wouldn’t book it if you’re very sensitive to cramped transport or if you’re expecting a cushy VIP-style ride. The views are the point, but the van comfort can shape how enjoyable the day feels.
If you’re flexible on seats and you want a straightforward, Spanish-led canyon day, this tour is a practical way to do it.
FAQ
How long is the Excursion al Gran Cañon en español from Las Vegas?
It lasts about 10 hours.
Where does the tour pick you up?
Pickup is included from hotels on the Strip and also from downtown Las Vegas.
What language is the guide?
The live tour guide is in Spanish, with audiovisual support in the van and Spanish audio included.
Is the Hoover Dam included?
Yes. There is a photo stop at Hoover Dam.
Does this tour include tickets for Grand Canyon West?
Yes. Entrance tickets are included for Hualapai Indian Park where Grand Canyon West is located.
Is Skywalk included?
No. Skywalk is optional and not included in the base tour price, but your guide can offer the entrance separately.
Do you stop at Lake Mead?
Yes. There is a short photo stop at Lake Mead National Recreation Area.
Is lunch included?
You’ll have access to SkyView Restaurant during the Grand Canyon West time to choose food from the menu.
What do I need to bring?
Bring a passport or ID card.
Is it wheelchair accessible?
No, it is not suitable for wheelchair users.
If you want, tell me your travel dates and whether Skywalk is a must for you, and I’ll help you think through the best way to plan your day around this 10-hour schedule.
]]>What I like most is the straightforward setup: you get a name sign greeting at the airport and you ride in a private vehicle with no extra stops for other passengers. The other big win is peace of mind on cost, because the price is built to include taxes, fees, and handling charges, so you’re not doing the last-minute scramble to pay extra.
One consideration: like any pickup service, timing and meeting points matter. If you have limited mobility or you’re worried about locating the exact pickup area quickly, read your voucher meeting instructions carefully and plan buffer time in case airport traffic or wayfinding is slower than you expect.
Key Takeaways for LAS to Downtown Comfort
- Private vehicle, no shared detours: you go directly toward your destination instead of waiting on other riders.
- Name sign pickup: your driver/representative holds a sign with your name at the airport meeting point.
- All-in pricing: taxes, fees, and handling charges are included so you avoid surprise line-item costs.
- Fast start to your trip: the transfer is about 35 minutes depending on traffic.
- Limited luggage rules: max 1 suitcase and 1 carry-on per passenger; oversized items may be restricted.
- Free cancellation up to 24 hours: you can cancel for a full refund if your plans change.
Why This Private LAS-to-Downtown Transfer Makes Sense
If your main goal is to get to your hotel without adding stress, this kind of transfer does that job well. After a flight, the last thing you want is decision fatigue: where to stand, which line to enter, whether your taxi app will behave, and how long it’ll take to get rolling. A private pickup removes most of that mental load.
This transfer is also a smart match for real-world Las Vegas timing. Downtown traffic can swing, and airport routes aren’t always smooth at peak arrival hours. The good news: you’re not stuck coordinating with a bunch of strangers. Your ride is sized for your group only, and the trip is designed to be a straight run from airport to downtown.
Finally, I like the “no surprises” approach. You’re told that taxes, fees, and handling charges are included, and that tips/tolls are covered in the all-in price. That matters because airport transfers often hide extra costs at the worst possible time—right when you’re already tired.
From Harry Reid Airport to Downtown: What the 35-Minute Ride Feels Like
The experience is built around a simple promise: get picked up at Harry Reid International Airport (LAS) and drop off in Downtown Las Vegas. The travel time is listed as about 35 minutes, and it’s approximate because traffic and time of day can change things.
In practice, that timeframe usually works best if you’re doing a check-in that can handle a late arrival. You’re not paying for a long sightseeing ride; you’re buying a clean, direct connection between landing and hotel reality.
What “Private” Means Here
Private isn’t just a marketing word. You avoid the classic shared-ride downsides:
- no waiting while other passengers get gathered up
- no extra stops or branching routes
- no awkward questions like, Are we going to the right hotel?
You still get a professional driver, and you’re transported by a private vehicle directly to your destination. For many people, that’s the real value: fewer unknowns.
Meeting Your Driver: The Name-Sign Advantage (And What to Watch)
The pickup method is clear and designed to reduce mistakes. At the airport meeting point described in your voucher, your driver or representative will hold up a sign with your name.
That little detail is bigger than it sounds. At an international airport, you don’t want to scan faces, compare plate numbers, or guess who’s holding the right paper. A name sign gives you a quick visual anchor so you can move straight from arrival to car.
Still, there’s one practical thing to keep in mind: you must match the meeting point shown in the voucher. One issue that can happen with pickup services is assuming the driver will find you somewhere more convenient than the actual meeting location. If you’re arriving after a long flight, or if you’re traveling with a companion who needs extra time, give yourself breathing room. Airport navigation can be slower than it looks on a map, especially when you’re tired.
Getting to Your Hotel: Drop-Off Comfort in Downtown
Your end point is Downtown Las Vegas, and the transfer includes hotel pickup and drop-off. That means you’re not just deposited on a random corner and told to figure it out with your luggage.
A drop-off matters in Vegas because “downtown” can cover a lot of walking territory. Having a driver take you right to your hotel or lodging keeps you from dragging bags across busy streets or searching for a best entrance after a long travel day.
And because the transfer is private, you don’t have to negotiate with a shared vehicle schedule. You go when you’re ready, and you arrive without extra stops.
Luggage and Size Limits: The Rules That Keep Things Smooth
This transfer is set for typical travelers with normal baggage. You’re allowed a maximum of 1 suitcase and 1 carry-on bag per passenger.
The important part for planning: oversized or excessive luggage (for example surfboards, golf clubs, or bikes) may face restrictions. The guidance is to check with the operator before travel if you’re bringing anything larger than standard luggage.
If you’re traveling with golf clubs, a bike, or sports gear, do yourself a favor and verify early. It’s the difference between a clean ride and a last-minute scramble.
Price and Value: Why $54 Can Be a Good Deal
At $54 for a one-way private transfer (about 35 minutes), you’re paying for three things: direct routing, a private vehicle, and an organized pickup.
Could you do it cheaper with a taxi or ride-hail? Sure, sometimes. But the hidden cost of alternatives is time and uncertainty. If you land tired, or you arrive when lines are long, saving a few dollars can turn into spending your energy fighting logistics.
This price is also presented as all-in, including taxes, fees, and handling charges. That’s valuable because airport transfers are where surprise add-ons often appear. You’re not trying to reconstruct costs while juggling luggage, bags, and a tired brain.
So I’d judge value like this:
- If you want less hassle and a predictable arrival, the price feels fair.
- If you’re comfortable dealing with airport pickup areas and don’t mind waiting, you might compare options.
- If you have any complexity (lots of bags, late arrival, needing a very specific pickup spot), private tends to pay off quickly.
Reliability Reality Check: How to Reduce the Risk of a Missed Pickup
No transfer is risk-free, and the strongest services are the ones where communication and clarity work. The experience package includes a mobile ticket and you receive confirmation at booking, plus your driver/representative meets you with a sign.
Still, here’s how you stack the odds in your favor:
- Check the voucher meeting point before you leave for the airport. Don’t assume it’s where you think it should be.
- Have your mobile ticket ready when you arrive.
- If your flight is delayed, update the situation fast. You don’t want the first time you reach out to be after you’ve already missed the window.
One caution I’ve learned from the less-great stories people share about this type of service: if a driver doesn’t arrive and you’re not able to reach anyone quickly, you can feel stranded fast. You’re most protected when you follow meeting instructions closely and keep your contact options working.
Who This Transfer Is Best For
This setup works especially well if you fall into one of these groups:
- You’re landing at LAS and want a direct, low-stress route to Downtown
- You’re traveling with luggage and don’t want to drag it through busy pickup zones
- You prefer clear pickup identification via your name sign
- You’d rather pay for predictability than gamble on wait times
It’s also a good choice if you’re the type who likes to spend travel energy on your day—not on figuring out where to stand.
Should You Book This Private LAS-to-Downtown Transfer?
I’d book it if your priority is a calm start. The combination of private transport, a clear name-sign pickup, and an all-in price is exactly what helps on a travel day when you’re short on patience and long on luggage.
Skip it only if you’re very price-sensitive and you’re confident you can handle airport logistics easily, even when you’re tired. Also, if you’re bringing oversized items or you’re traveling with anyone who needs extra assistance, confirm luggage rules and plan extra buffer time for meeting the driver at the voucher’s pickup point.
If you want the simplest Vegas arrival possible, this is a solid way to get moving fast—without the airport circus.
FAQ
Where does the transfer start and end?
It starts at Harry Reid International Airport (LAS) at 5757 Wayne Newton Blvd, Las Vegas, NV 89119, and it ends in Downtown Las Vegas.
How long does the transfer take?
The duration is listed as approximately 35 minutes, depending on time of day and traffic.
How will I find my driver at the airport?
Your driver or representative will meet you at the meeting point listed in your voucher and will be holding a sign with your name.
Is the transfer one-way or round-trip?
It’s a one-way private transfer.
What’s included in the price?
All taxes, fees, and handling charges are included, along with hotel pickup and drop-off and transport by private vehicle.
How much luggage can I bring?
Each passenger can bring up to 1 suitcase and 1 carry-on. Oversized or excessive luggage may have restrictions, so check with the operator if you’re bringing sports gear or items bigger than standard luggage.
Is there free cancellation?
Yes. You can cancel for a full refund up to 24 hours in advance of the experience start time.
If you want, tell me your hotel area in Downtown (and roughly what time you land), and I’ll help you sanity-check whether a 35-minute transfer will fit your check-in plan.
]]>